Application Server 2014 (v4.0) Install Guide
| |

| INSTALLATION GUIDE |
Description
This article guides the user through the installation process of Wonderware's System Platform 2014 - Application Server (v4.0) components. In addition, this article includes steps that can be used to test the installation. This guide applies to an installation of a simple ArchestrA Object Server or a Development Environment depending on product selection covered in the Detailed Steps section.
| Author | Ralph Andrews |
| Publish Date | Jan 14, 2014 |
| Applies to Software | |
| Applies to Version | |
| Applies to System/Module
| System Platform - Application Server |
| Article Version | 01.01.01 |
************************************************************************************************************************************************************
Before you Begin
Procedure Check List
Pre-Requisites
Windows Operating Systems
The following Windows operating systems are no longer supported:
- Windows XP, all versions
- Windows Vista, all versions
- Windows Server 2003, all versions
- Windows Server 2008, non-R2 versions (R2 is a 64 bit platform only)
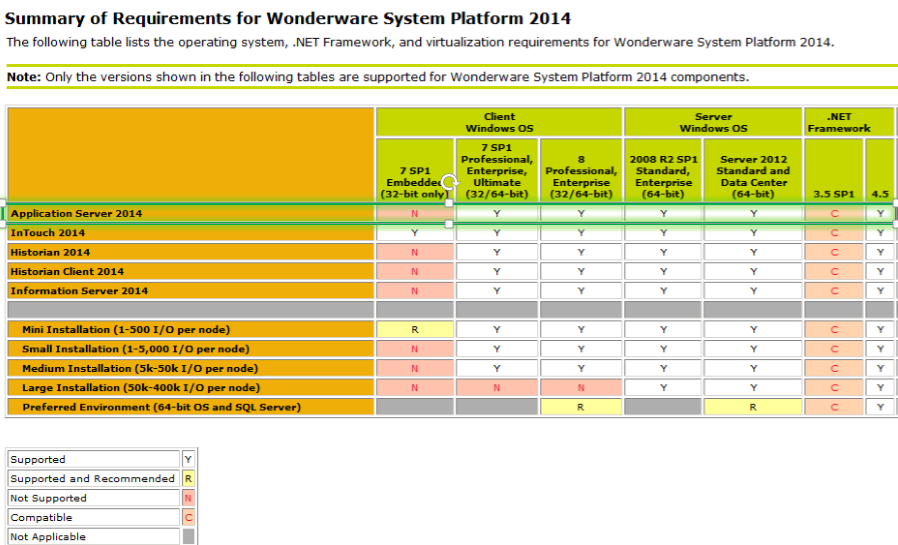
![]() Operating System Requirements:
Operating System Requirements:
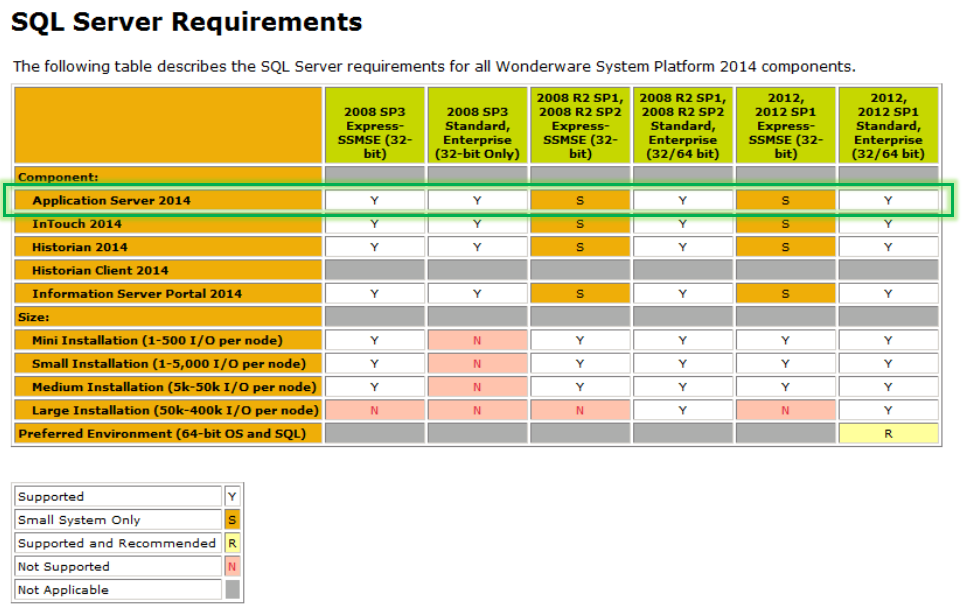
SQL Server Database Requirements (Galaxy Repository Only)
If installing the Galaxy Repository component, Microsoft SQL Server must be installed. The chart below shows version compatibility.
Detailed Steps
| Application Server Component | ||||
|---|---|---|---|---|
| Purpose of PC | Bootstrap | IDE | Galaxy Repository | PDF Documentation |
| Galaxy Repository (GR) | Required | Recommended | Required | Recommended |
| Development Station | Required | Required | Not Required | Recommended |
| Platform | Required | Not Required | Not Required | Recommended |
- Prior to beginning the installation, a summary of your choices will be displayed.
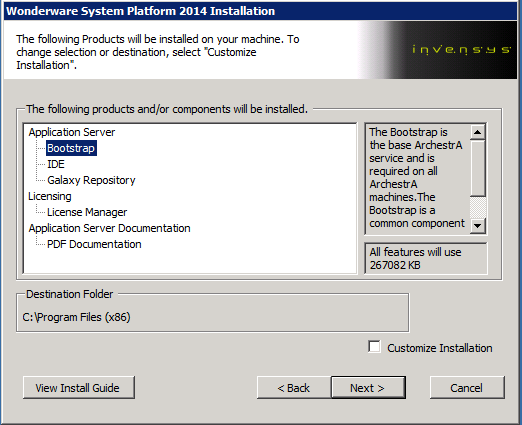
If the displayed options are correct click the "Next" button to continue. If product selections need to be modified, or the Destination Folder must be changed, or put a check mark in the "Customize Installation" option and then click the "Next" button.
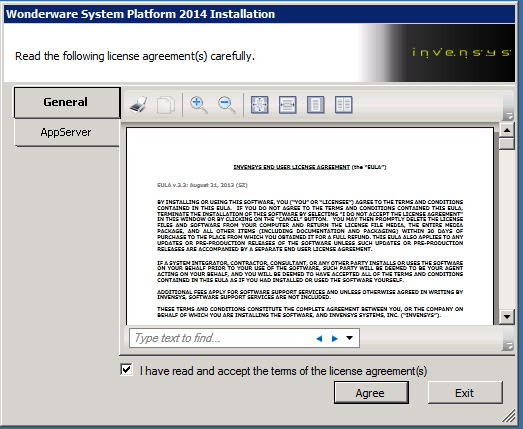
- Review and accept the license agreement of the components selected. click the "Agree" button.
- If this is the first Wonderware product installed on the PC, a prompt will request the username and password of a Windows Administrator for the PC.
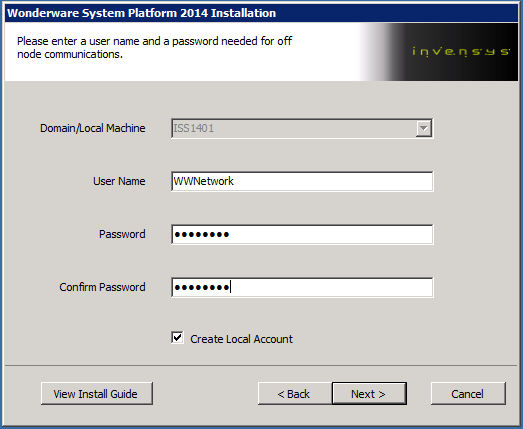
This account will be used for communicating with Wonderware software running on other PCs, and for running the Wonderware software products locally on the PC with Administrator access.
The user account entered should be the same on all PCs running Wonderware software. If a Windows account does not already exists, select the "Create Local Account" option to have the software create the Windows user account automatically.
To use an existing Domain account uncheck the "Create Local Account" and enter the domain name.
Once the information has been entered, click the "Next" button to continue.
Note: Because this is a Windows user account, the username and password used will need to comply with any security policies that exist on the system.
- Product specific prerequisites will be checked
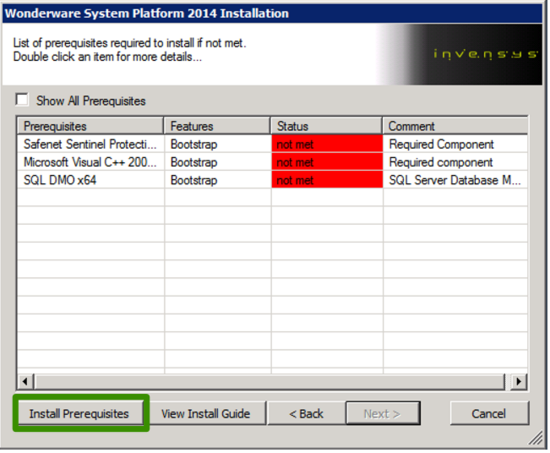
Depending on your system and what software is already installed, you may or may not be required to install additional software before beginning the main installation of System Platform. If any prerequisites are missing they will be listed.
If any prerequisites are missing, click the "Install Prerequisites" button to attempt to install the missing software. The install may take a few minutes, and during this time the software may appear as though it has crashed. Please wait for it to finish which may take upwards of 30 minutes. When finished, you may be prompted to reboot.
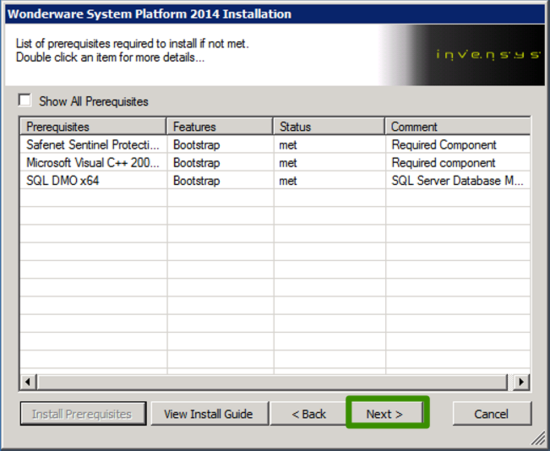
Once all prerequisite criteria are met, click the "Next" button to continue.
- Again, the list of components selected for installation are again shown. Note that the License Manager is installed by default.
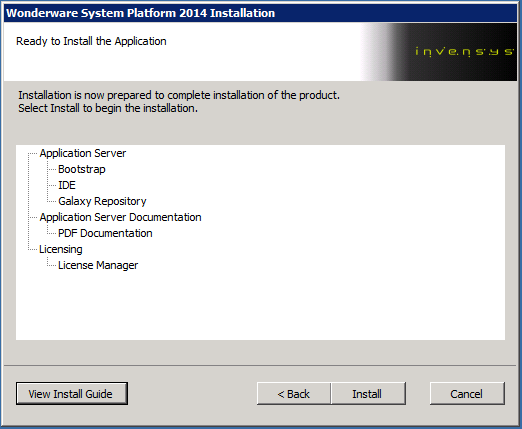
Click "Install" to continue.
- A software installation is now complete as shown in the final screen.
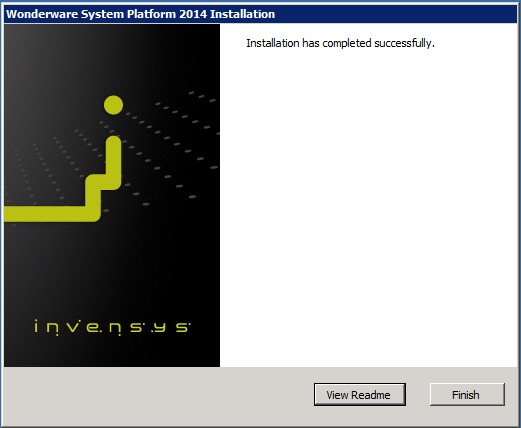
Click "Finish" to complete.
- A configuration splash screen now shows to complete the final configuration of the software installed,
- A reboot now may be required to complete.
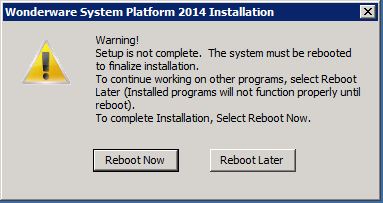
- This completes the installation of Wonderware Application Server.
Licensing
See (TBD - as directed) for details of licensing Wonderware Application Server.
Related Videos
None