TN WW204 How To Enable Remote Access To Administrative Shares in Windows 10
![]()
This Tech Note explains how you can enable remote access to administrative shares in Windows 10.
- Author: Alex Davenport
- Published: 03/01/2017
- Applies to: Windows 10
First, you need to have a local account with administrative rights on the computer you want to connect to running Windows 10 or older.
You may need to enable Advanced Sharing. Right click any disk drive using File Explorer and click Properties. Then click Advanced Sharing, and turn on file sharing when it asks if you want to enable it. (Don’t share the disk drive, just close the dialog box.)

Now you can connect to a remote share (i.e., \\SERVERNAME\c$) but get prompted to enter a username and password.
If you enter the username and password of the local account on the server, (i.e., \\SERVERNAME\MyAdminUser), you still get an error message.
This is because of a default security policy that disables access to administrative shares.
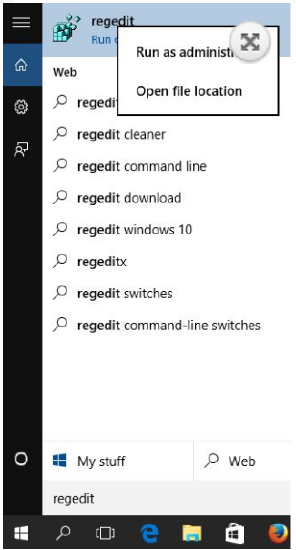
1 Click the Windows Start icon and search for “regedit”. Right click and select “run as administrator”.
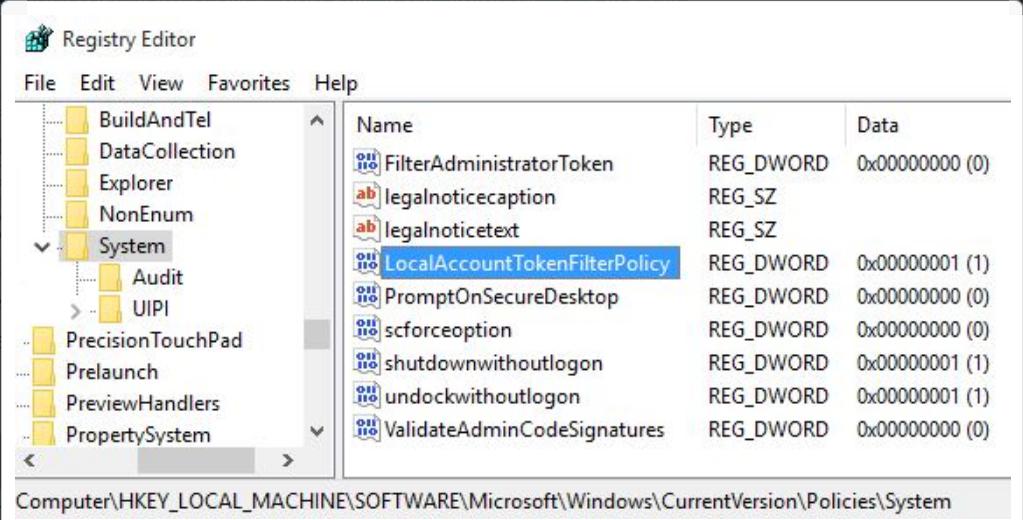
2 Expand the tree to HKEY_LOCAL_MACHINE \ SOFTWARE \ Microsoft\ Windows \ CurrentVersion \ policies \ system.
3 Create a new key (Right click -> New -> choose “DWORD Value (32bit)”).
4 Name the key “LocalAccountTokenFilterPolicy” and give it the value of “1”. Click OK.
5 Reboot the server to enable the setting to take effect.
6 Now when you try to access the administrative shares on the remote computer, it should work.