TN WW238 Understanding Intermittent System Performance Degradation with Occasional High Memory Utilization
![]()
Description
This article from InSource shows troubleshooting intermittent system performance degradation with occasional high memory utilization.
- Author: Peter Farrell
- Published: 06/17/2019
- Applies to: All versions
Details
Intermittent performance degradation is observed from time to time where it could be argued that physical memory, although technically adequate and meeting stated system requirements, is marginal as far as resource is concerned. During periods of peak demand, such as when you may be opening an object, touching an external .dll, creating a new object where temporary buffer, you will see spikes in resource which settle back down. In addition you may have a situation where within the OS the hard drive swap file is called into play to cover the additional demand on RAM. It’s that invocation of the swap file that results in the Event Viewer warnings about performance.
SQL Server database backups are another example where additional resource is required.
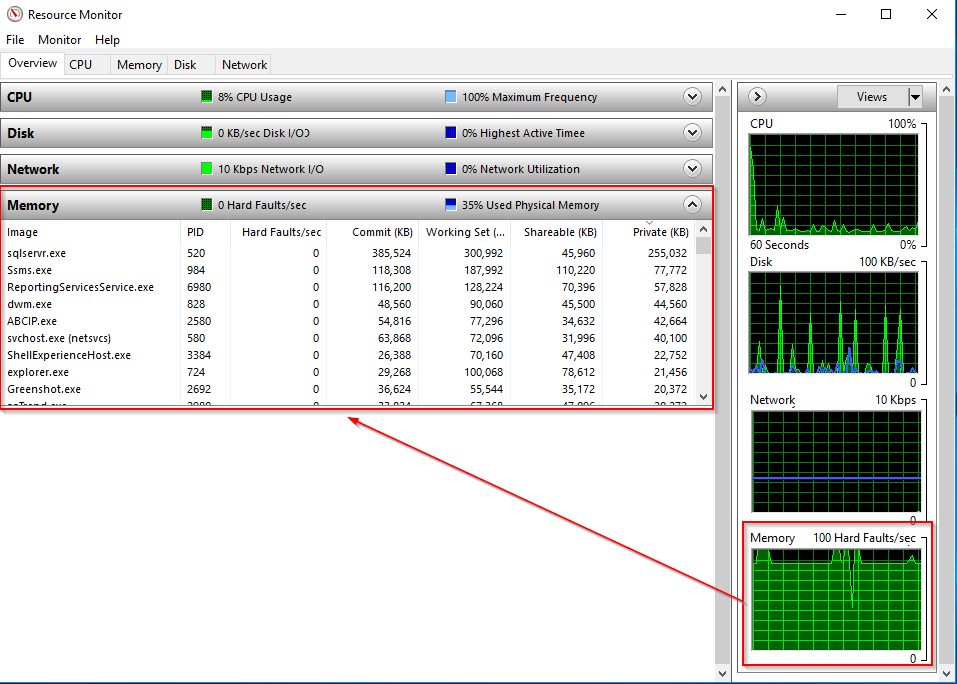
You can quickly check the dynamic performance of memory by opening the Task Manager and navigating to the Performance Tab. At the bottom of the screen you will see a small blue font link “Open Resource Monitor”. Click that link and the System Resource Monitor will open. You can then expand the section for Memory to view the details of memory usage.
If your system is suffering with intermittent memory overloads and you can determine from the Resource Monitor that the cause is due to occasional high demand processes, you may be able to improve performance by adjusting virtual memory or by reconfiguring the Swap File.
By increasing virtual memory, even if physical is above the requirements since it is hosted in virtualized environment, this issue may resolve. Microsoft has published recommendations which detail the circumstances and cause in their Knowledge Base at http://support.microsoft.com/kb/2860880
To verify/change virtual memory settings:
- Open Computer Management.
- In the console tree, right-click Computer Management (Local), and then select Properties.
- On the Advanced tab, under Performance, click Settings.
- Under Virtual memory, click Change.
- In the Drive list, click the drive that contains the paging file you want to Verify/change.
- If necessary, under Paging file size for selected drive, click Custom size, type new paging file sizes in the Initial Size (MB) and Maximum Size (MB) boxes, and then click Set.
- Click OK.