TN - 1306 Installing RabbitMQ MQTT Broker and Connecting System Platform to Worktasks
Description
This article shows how to set up RabbitMQ as an MQTT broker specifically for websocket use inside of Work Tasks. It can be used to load live data into forms from System Platform Objects (PLC Data) or other user data being fed into MQTT topics.
This guide will cover the basics to setup, but I highly encourage you to view the documentation on RabbitMQ's website if you are interested in diving deeper. It is very detailed and helps explain some more complex topics that are not covered here.
- Author: Devin Hepburn
- Published: 12/15/2022
- Applies to: AVEVA Work Tasks 2020
Details
Important Links:
Erlang/RabbitMQ Compatibility Matrix: https://www.rabbitmq.com/which-erlang.html
Erlang Download: https://erlang.org/download/otp_versions_tree.html
RabbitMQ Download: https://www.rabbitmq.com/install-windows.html#installer (.exe download is down the page some)
Installing RabbitMQ
- RabbitMQ supports Linux, Windows, and Mac platforms. This guide will assume that the user is installing the RabbitMQ on Windows, as that is what our product suite is build on top of. RabbitMQ requires Erlang. Please ensure that the version of RabbitMQ you intend to install is compatible with the version of Erlang you are layering it on top of. See above for the compatibility matrix.
- Install Erlang - Run as Administrator
- Install RabbitMQ - Run as Administrator (Restart system once install completes)
Configure RabbitMQ
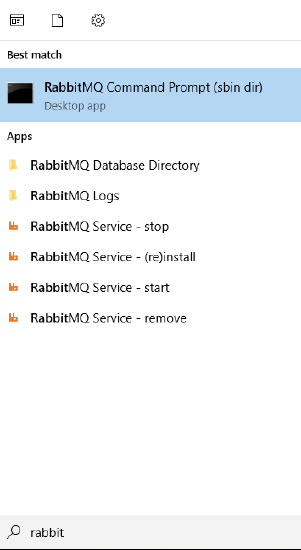
- Open RabbitMQ Command Prompt. This is essentially the same as launching CMD as Administrator inside of the sbin directory of RabbitMQ.
- Next, we will run a few commands to "start" plugins for RabbitMQ, as it is only configured for AQMP by default. We will be using the MQTT and Web_MQTT plugins.
 This allows us to use the web based UI to configure users and view status.
 This enables MQTT
- This enables MQTT through Websockets (HTTP)
- When addressing RabbitMQ through websockets, we must use the ws endpoint. This information will be important when setting up the WorkTasks connection.
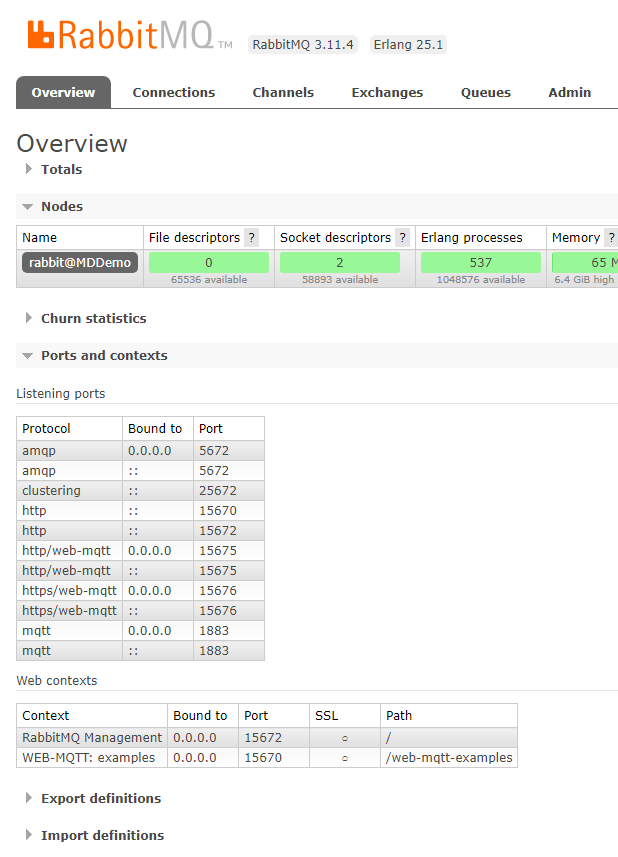
- By default, only the user guest is enabled and has a password of guest. It can only be accessed from the local host. The management UI can be reached at 127.0.0.1:15672. Access the page and login using guest. The login screen should look similar to what is shown below. It will give statistics on plugins running as well as what interface/port they are using.
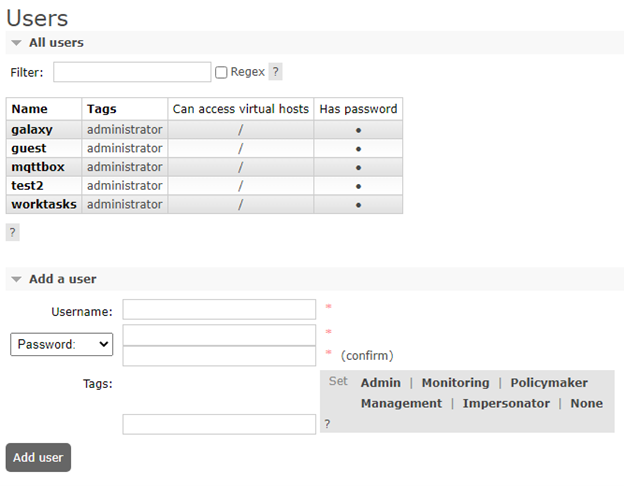
- Next, we will add some additional users that can be used for secure connections to the MQTT broker. Click on the "Admin" tab at the top.
- We will be adding users. Feel free to give these accounts names that make sense for your application. After a username/password has been added, we can select tags for the user that will give them management prilvages.
- By now, you should have a RabbitMQ broker that is running with MQTT and MQTT_Websocket functionality on default ports. You can change these ports via a configuration file, but that is outside the scope of this article.

Configuring System Platform
For our example, we will be retrieving live values from System Platform object attributes and feeding them into WorkTask for use in live forms. These values are being populated by PLC drivers that are assumed to be set up already. We will cover the MQTT connection and how we can use that connection to publish data to topic names of our choice.
- In the SMC, we need to add an Archestra node and an MQTT Broker node to the OI.Gateway. The Archestra node will communicate Suitelink and grab information from object attributes and publish it to MQTT. The MQTT Broker node is where we enter credentials necessary to establish connection to the MQTT broker. This is where you will use the Username and Password created for the Galaxy communications inside of the RabbitMQ management UI.
- This assumes that the broker is running on the localhost. If it is not, then the address will need to be modified here. Same thing goes for the port. It needs to match your setup.
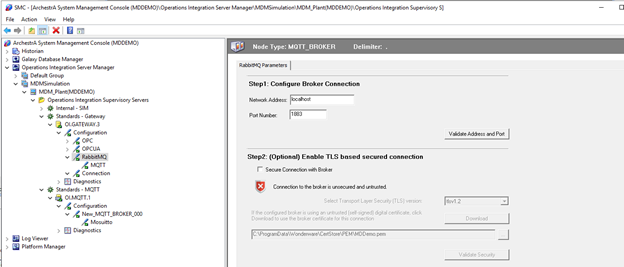
- Use the credentials here. We are not subscribing to any data inside of the MQTT broker, so we will not configure Device Items here.

- Next, we configure the Archestra Node to capture object data and publish it to the MQTT broker. It is important the the Item Reference matches that of the Object Attribute. The Name column is what is used for pushing to MQTT. These can be the same, but you can change them (alias) if doing so will clean up your data. These setup handles name mapping if desired.
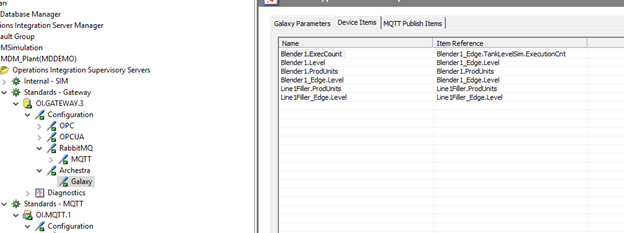
- Next, we configure the Topic name and push those tags out to the broker. Unique Item ID: will be the top level of your data going to the broker. For reference, MQTT topics are structured as follows, Level1/Level2/Level3/Tag.
- IMPORTANT: Archestra turns decimals into forward slashes for MQTT publishing to help with the schema. For example, Galaxy/Blender1.Level below is actually being published to topic Galaxy/Blender1/Level in the broker. Using that logic, we could subscribe to all blender 1 data by using Galaxy/Blender1/#.

(OPTIONAL) Verify data is flowing by using an MQTT client
- At this point, you should have data flowing into the MQTT broker, assuming values are changing and your recently configured drivers are active.
- You can verify this by subscribing to a few of the topics and watching the values change.
Configure AVEVA WorkTasks for MQTT Connection
Now we will connect to the broker with the WorkTasks javascript client via websocket. This will allow us to feed live data in from PLC objects and view them in the web based forms.
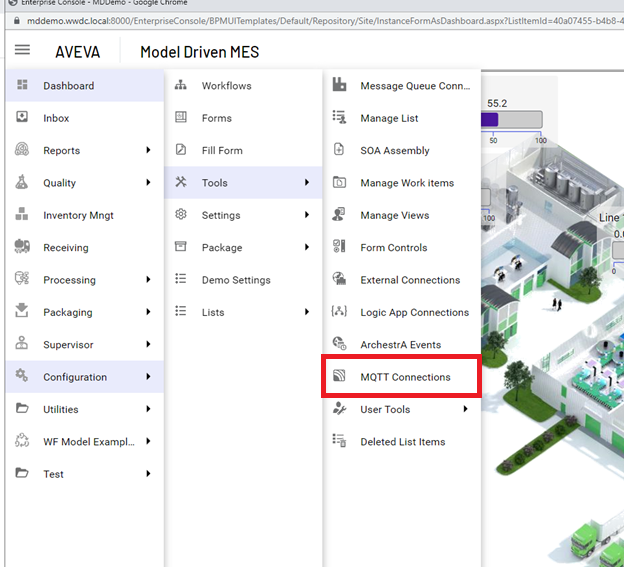
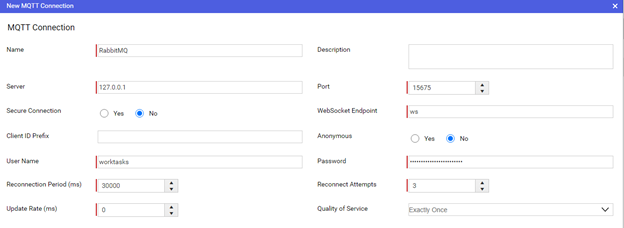
- Log into the Enterprise Console and navigate to the MQTT Conneciton setup page. Navigationt to it may differ based on how your Navigation List is setup, but it will typically be under settings or tools.
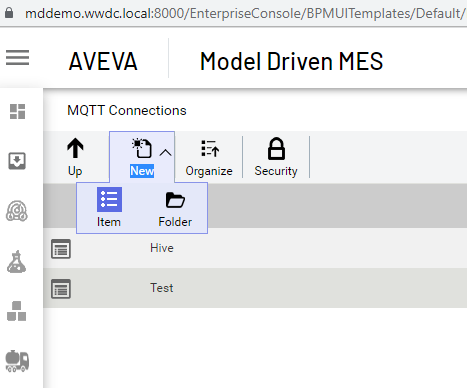
- Click "New" > "Item"
- This connection assumes that the broker is on the same system. If yours is not, use the appropriate server name in the setup. Same with port and username/password. These should match your configuration.
- Test the connection and ensure that it is successful.
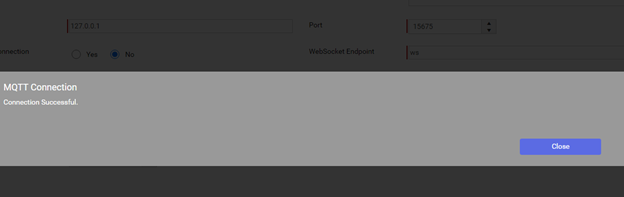
Now, you have successfully created a MQTT broker connection inside of WorkTasks. We can use this connection inside of forms to subscribe to topics and feed data in. This will be covered in the next section.
Feeding Data into Forms
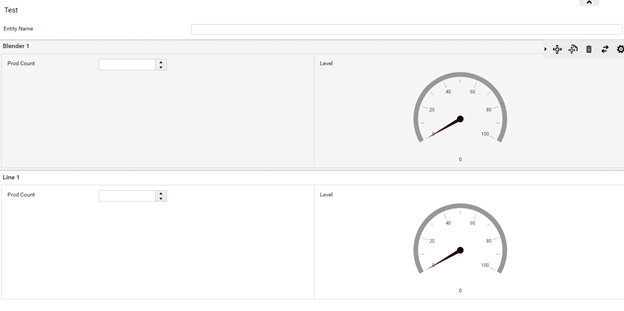
This guide assumes some familiarity with form development and comfort with adding controls to the forms. For MQTT, we can use number, text, or gauge controls.
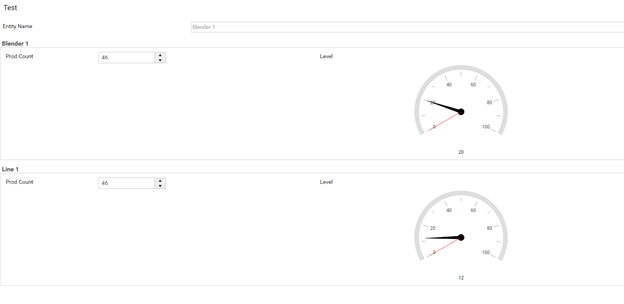
- Using the below controls, we can feed data into the form dynamically using MQTT. These values will update in real time and can even be fed into WorkFlows to log live quality data and interact with other user inputs.
- Click on the form parameters gear at the top of the form. This will come up when highlighting the top header of the form. MQTT settings for the form are managed here.
- NOTE: This setup will work best if the controls that you are piping MQTT data into are already created. Those controls become selectable from a drop down, making setup easier.

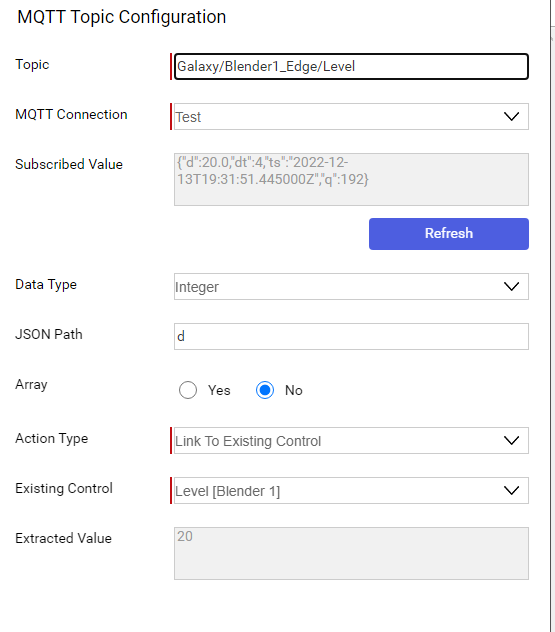
- Click on the "Advanced" tab and click the "+" under MQTT to add topic links.
- Few important things to consider at this step. As mentioned before, the topics are being fed in from object attributes with "/" instead of the decimal that is usually used with Object.Attribute notation. Be mindful of that here (see picture for reference). Also, System Platform is passing in a JSON element to the MQTT topic. This element contains data, datatype, timestamp, and quality information. For this example, we are only concerned with the data being passed, we parse out the "d". The value being captured can be verified at the bottom as shown.
- Let's save our progress and preview the screen to see if we are receiving data.
- Success!

Conclusion
We have now setup the MQTT broker, connected System Platform to said broker and piped that data into live forms using Work Tasks. This is an extremely powerful tool that help improve the functionality of your business process management.