Historian 2012 R2 Installation Guide
|
|

| INSTALLATION GUIDE |
Installation Guide for the Wonderware Historian
| Author |
|
| Publish Date | |
|
Applies to Software |
|
|
Applies to Version |
|
|
Applies to System/Module |
|
|
Article Version |
|
************************************************************************************************************************************************************
Before you Begin
Text...
Procedure Check List
|
Completed |
Task Description |
|
|
|
|
|
|
|
|
|
|
|
|
|
|
|
Pre-Requisites
The minimum hardware and software requirements for the Wonderware Historian are based on the tag count and the anticipated data throughput rate.
The recommended memory configuration for SQL Server 2008 (32-bit) is to clamp memory consumption to 50 percent of the amount of physical memory installed on the server or 512 MB, whichever is larger. For SQL Server 2008 R2 Standard and Enterprise editions (32-bit), the recommended physical memory configuration is 1 GB. The recommended Windows virtual memory setting is twice the amount of physical RAM installed on the server.
If you are running the Wonderware Historian on a virtual server, the historian must have an adequate CPU, adequate network memory, and disk I/O resources at all times. Overloading the virtual server
leads to unpredictable behavior.
You can install the Wonderware Historian on operating systems that have the User Account Control (UAC) turned on.
Detailed Steps
Run the setup program from the System Platform installation directory.
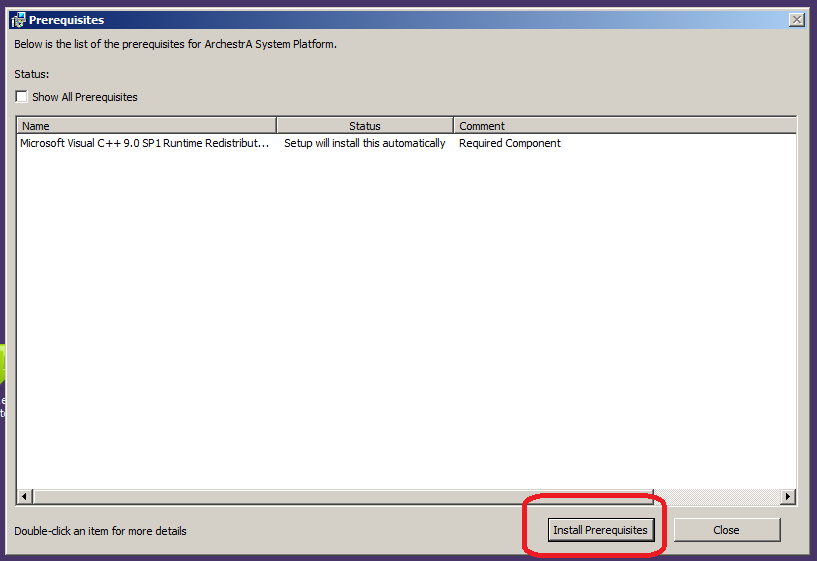
Install the Prerequisites
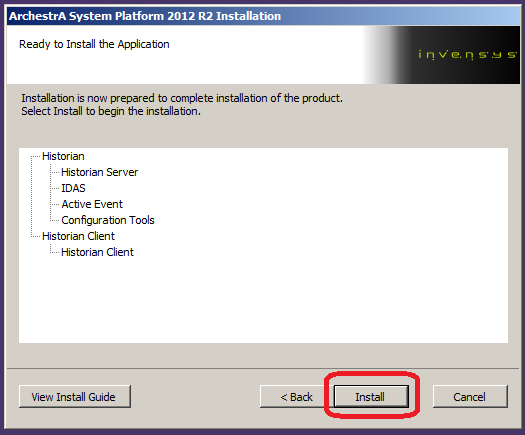
Select the Product based installation; and then the Historian server and/or client software.
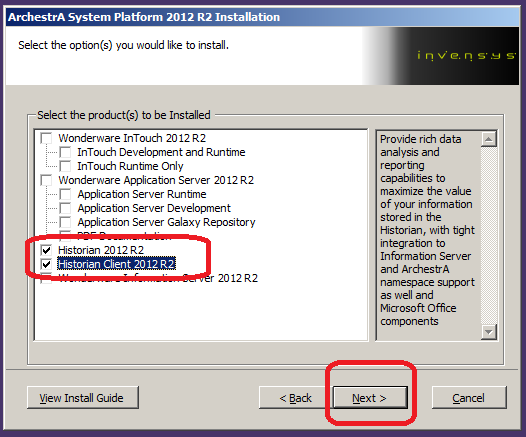
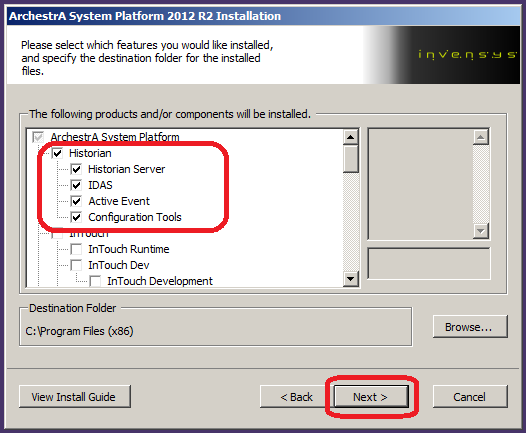
Optional: Select the "Customize Installation" selection to view the detail and potentially include/exlude certain software items.
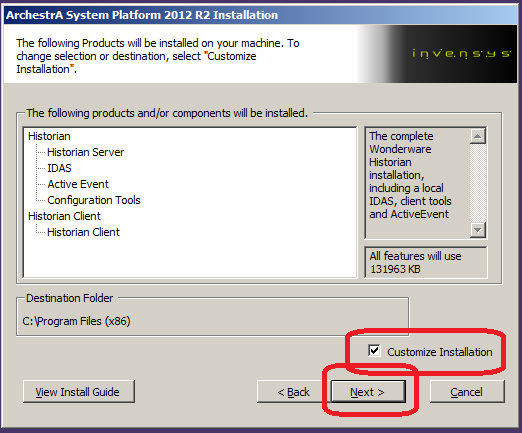
This screen (scrollable) shows you the individual components of the overall product installation.
In our installation, we will continue with all selections.
However, in certain cases, it is possible you would want to only select certain features.
Example: If this was an RDAS only installation, you would just need to install the IDAS and that is all.
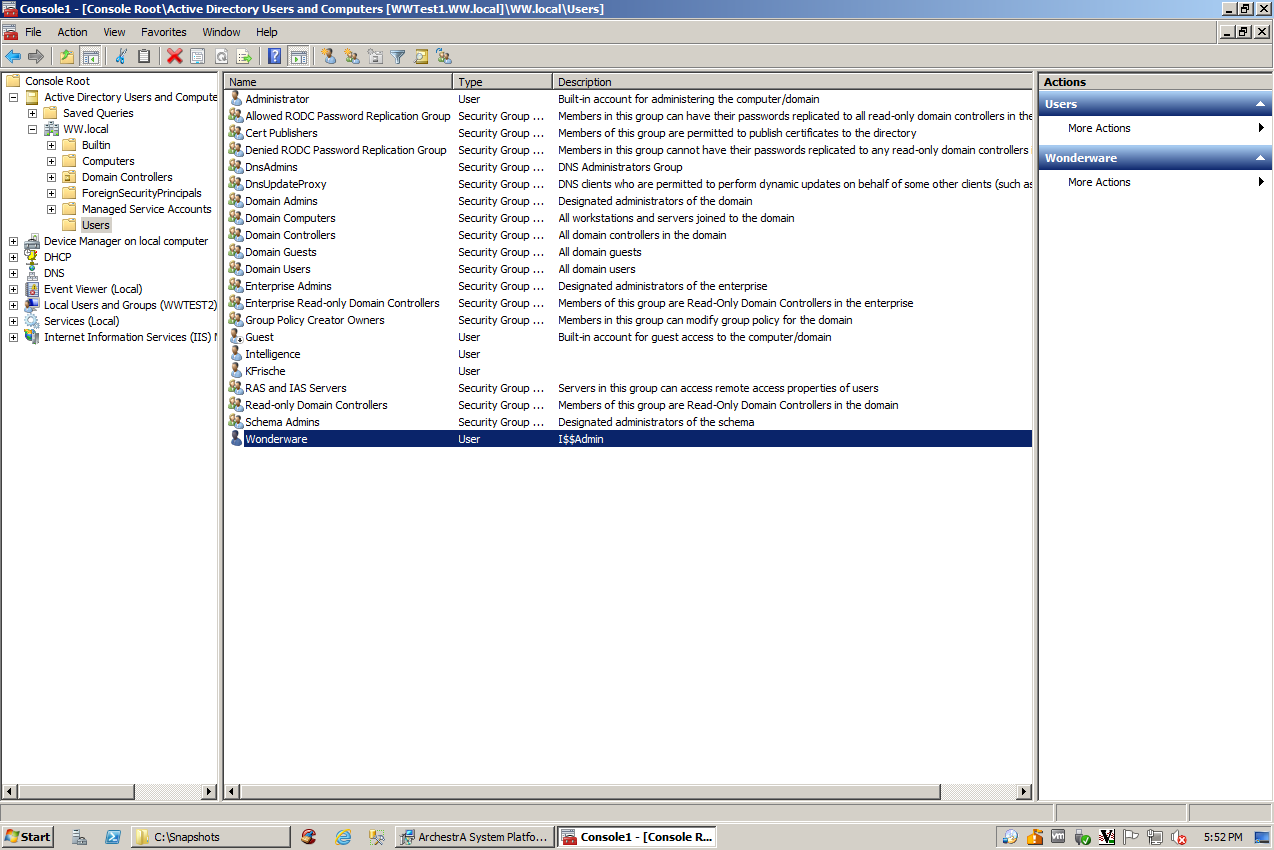
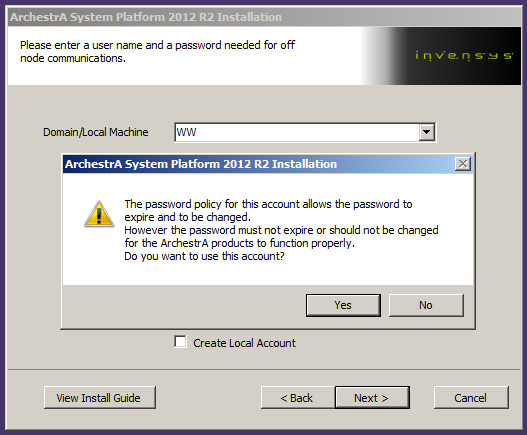
Enter the Microsoft Active Directory Domain, User, and Password.
If this installation is standalone or Workgroup based you will not have a Domain name so you would instead use your computer name.
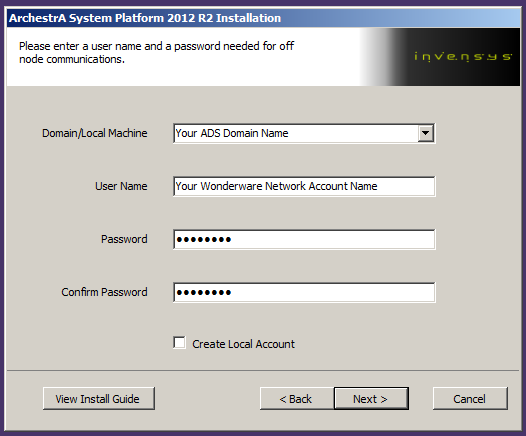
If you are on a domain, you will need to find the Network account used by all Wonderware software.
The message about password expiration is often inaccurate. The key is that the user being used does not have a password that expires.
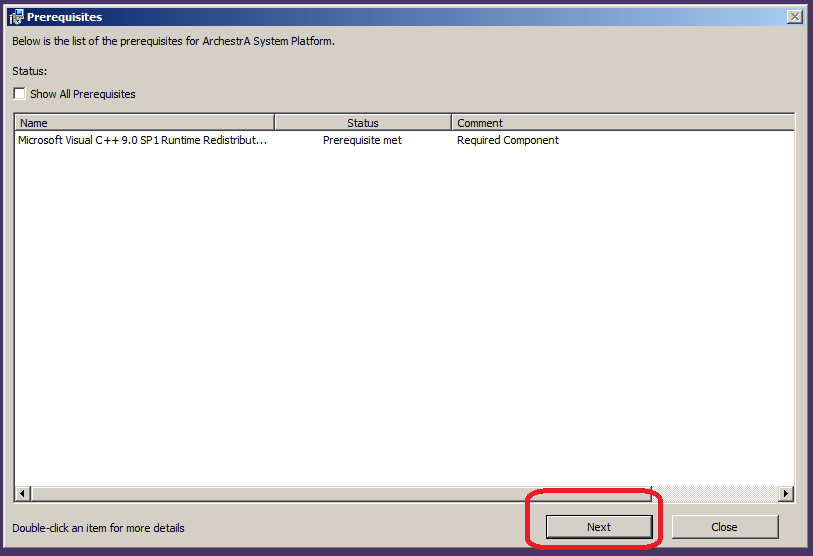
Verify that all prerequisites have been met; if not, install them.

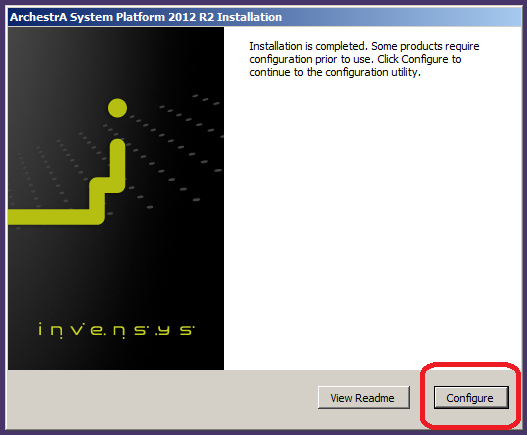
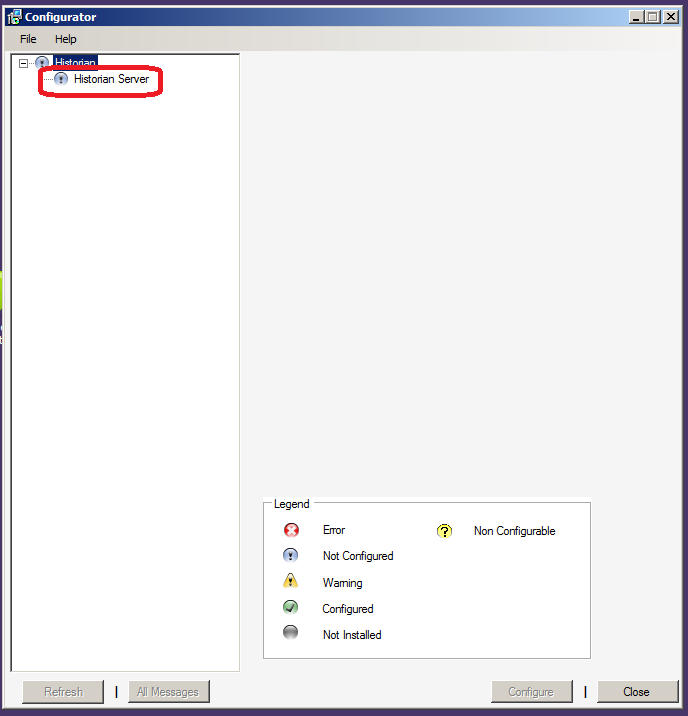
The "Configurator" screen automatically starts. You need to select the sub-row for the Historian Server.
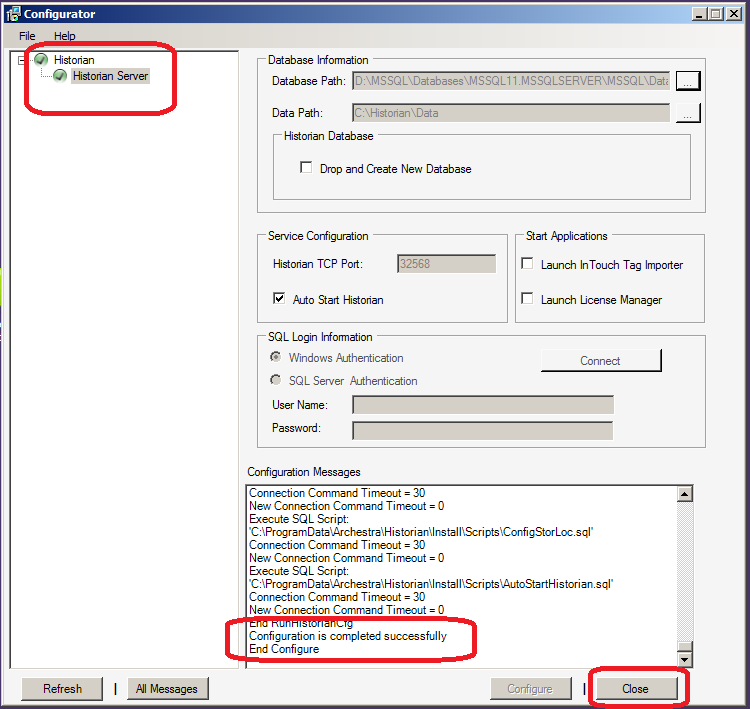
Optional: It's a good idea to set the Historian to Autostart.
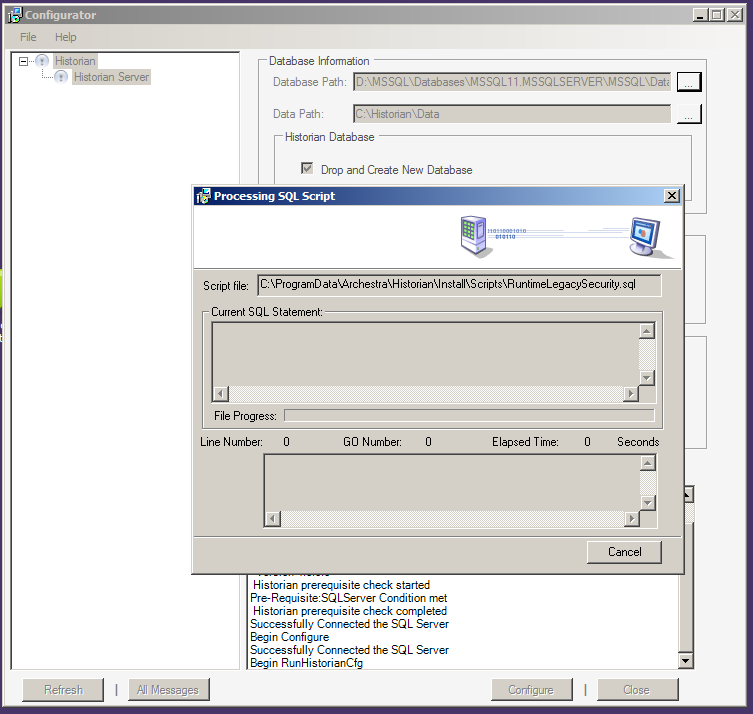
Select Configure.

Verify all completed OK.
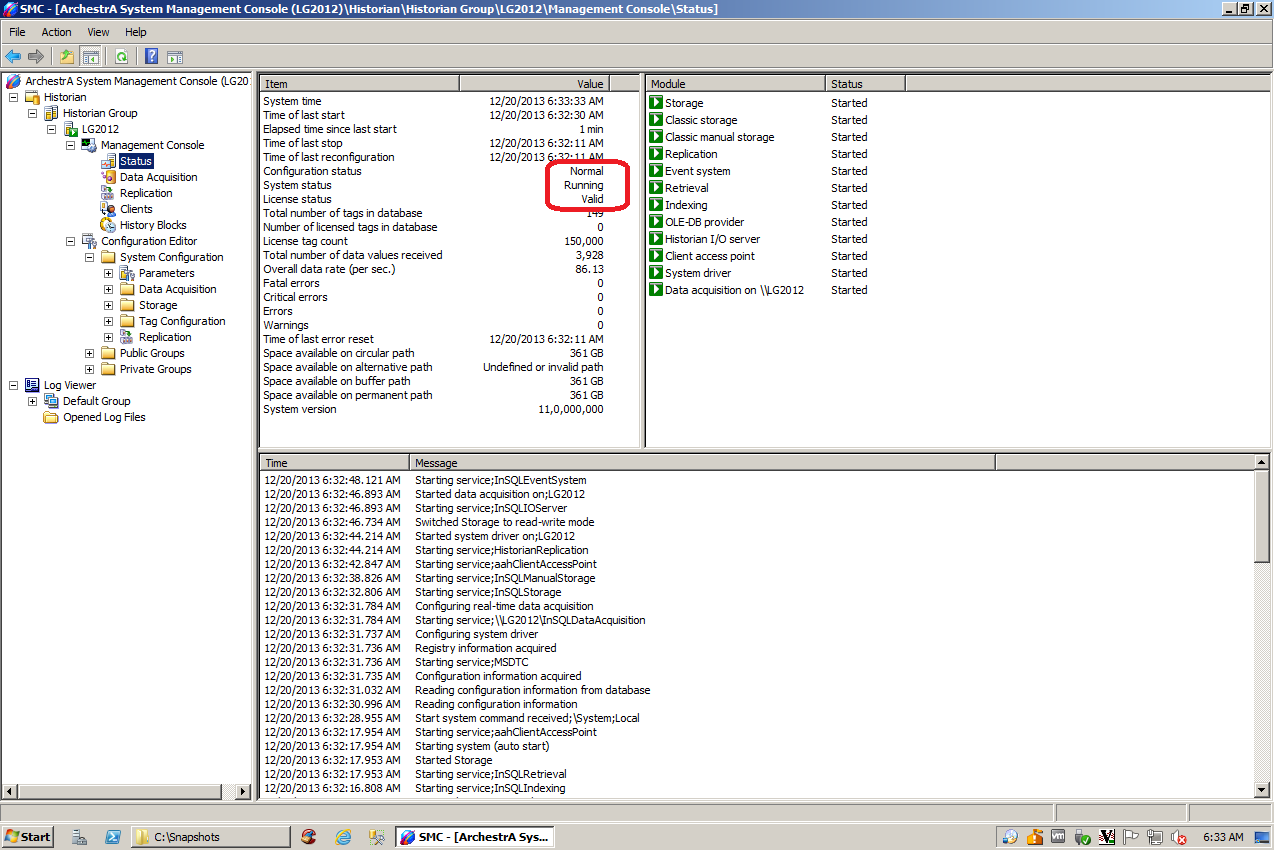
Check the SMC and review the installation.
Licensing
Text...
Validation of Solution
Text...
Related Videos