TN ITOMI110 Using the ViewApp NameSpace
![]()
Description
This article from InSource shows how to use the ViewApp NamSpace object to create a global (Galaxy wide) set of variables accessible from any OMI application.
You may need a set of standard variables that are common to all OMI applications running in that Galaxy. These variables can be read and written to from any ArchestrA object or graphic as required.
- Author: Chris Selph
- Published: 6/14/2019
- Applies to: System Platform 2017 Update 3 and greater
Details
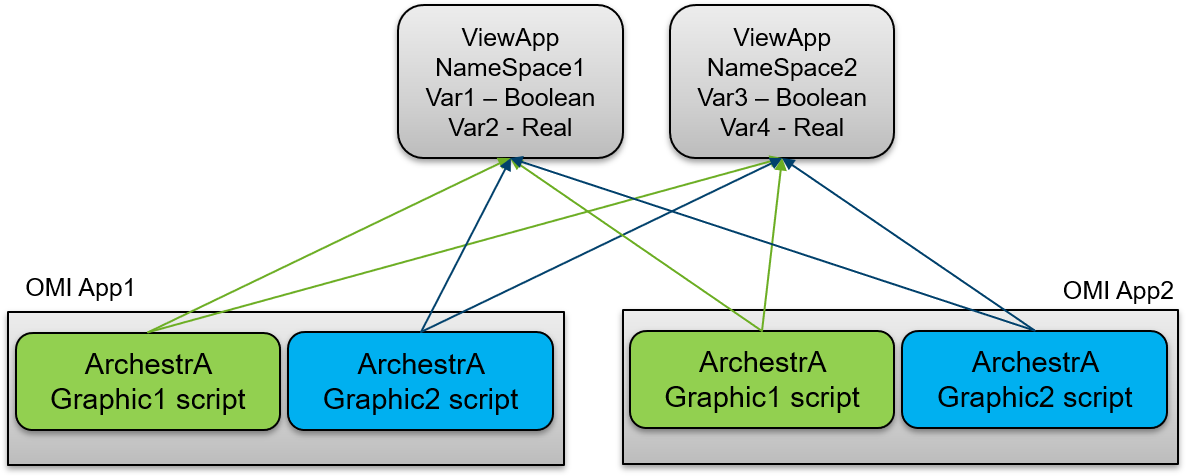
Here is a basic diagram depicting the overall concepts involved.
Workflow
- Using the IDE
- Create a ViewAppName Space object
- Create an ArchestrA graphic and associated scripting
- Ensure his ArchestrA graphic is "showing" somewhere in the OMI application
Building an example:
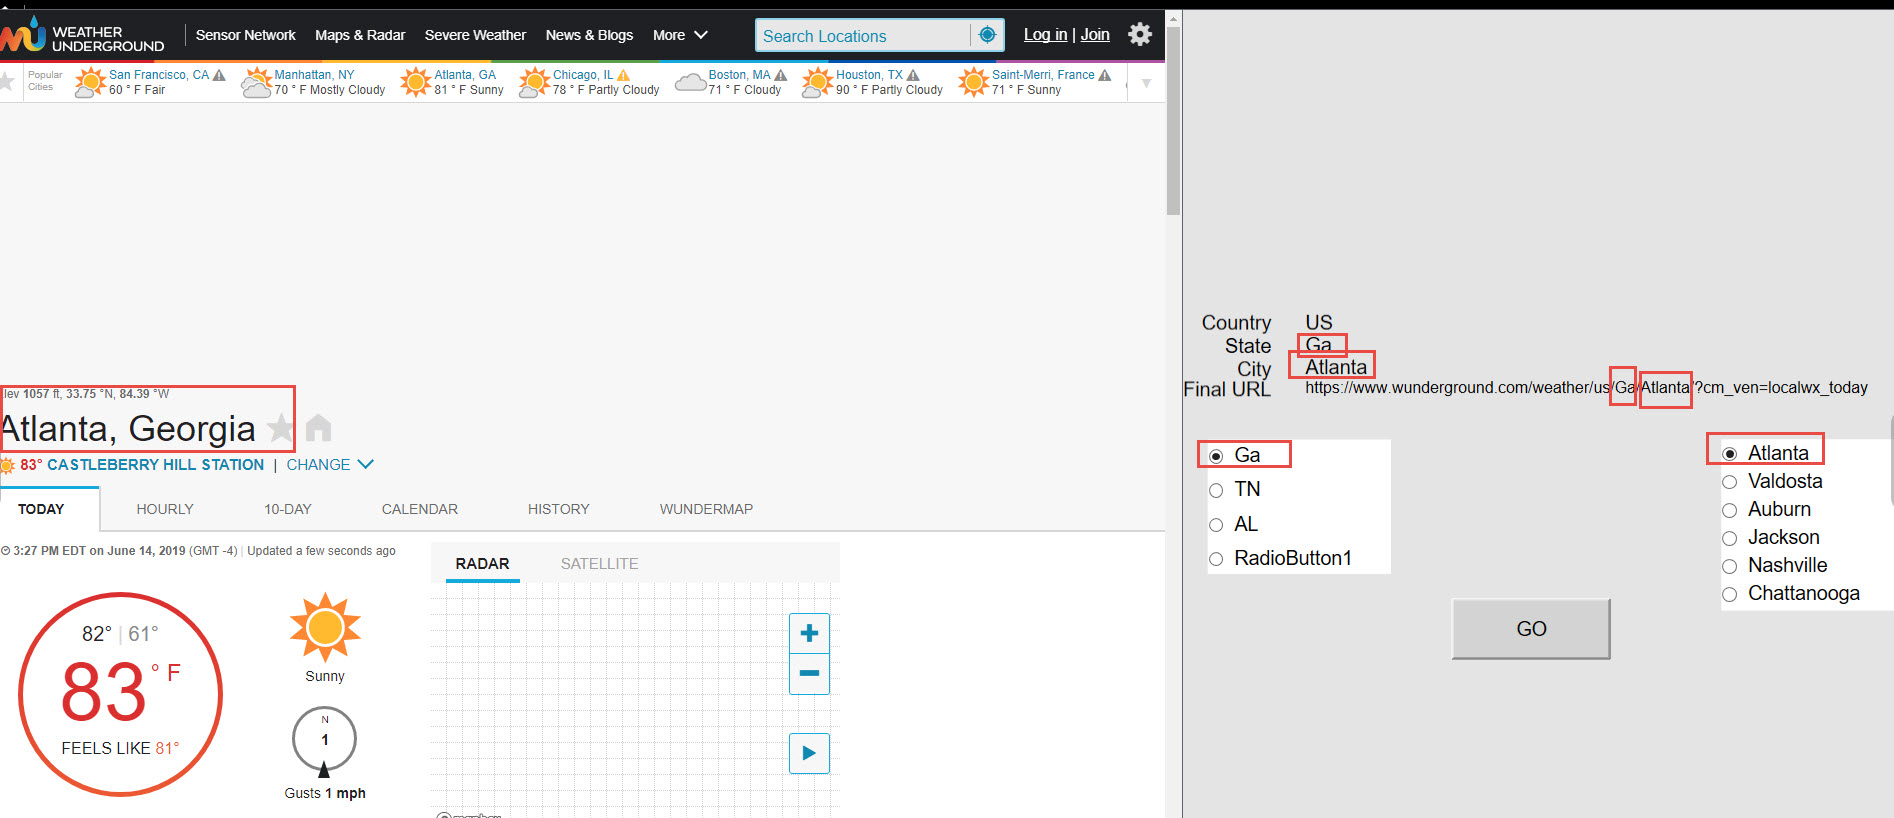
The example will use an ArchestrA graphic to build a web URL based on user selections (City and State). A script will concatenate strings to build a URL for the Weather Underground site to give current weather conditions in the selected city and state. The URL is then passed to the ViewApp NameSpace variable. The web browser app is configured to read the ViewApp NameSpace variable as its URL.
Here it is in action:
Step 1 - Creating the ViewApp object
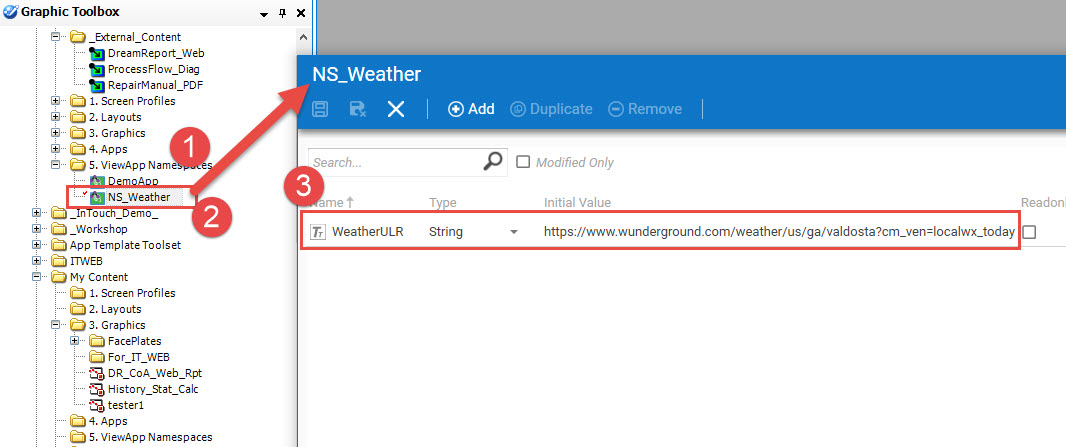
In the Graphic ToolBox, create a new ViewApp NameSpace and edit it.
Create a string variable and give it an initial value if required.
Step 2 - Create an ArchestrA graphic
Create a new Symbol
Add appropriate custom properties, scripts and visual elements
In this example, radio buttons drive the values of state and city custom properties
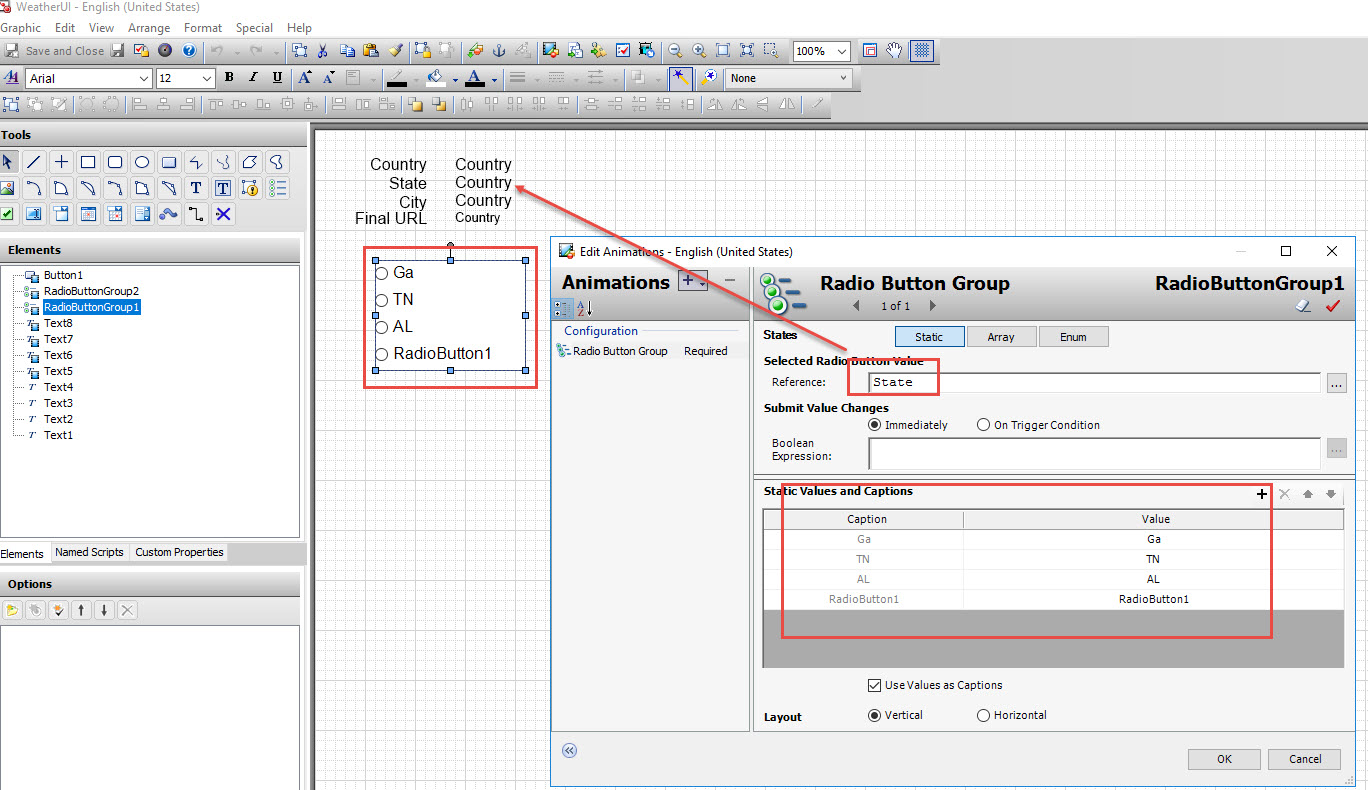
Add a script on a button that creates the URL and writes it to the variable in the ViewApp NameSpace. See line 7 for accessing the ViewApp Name Space object.

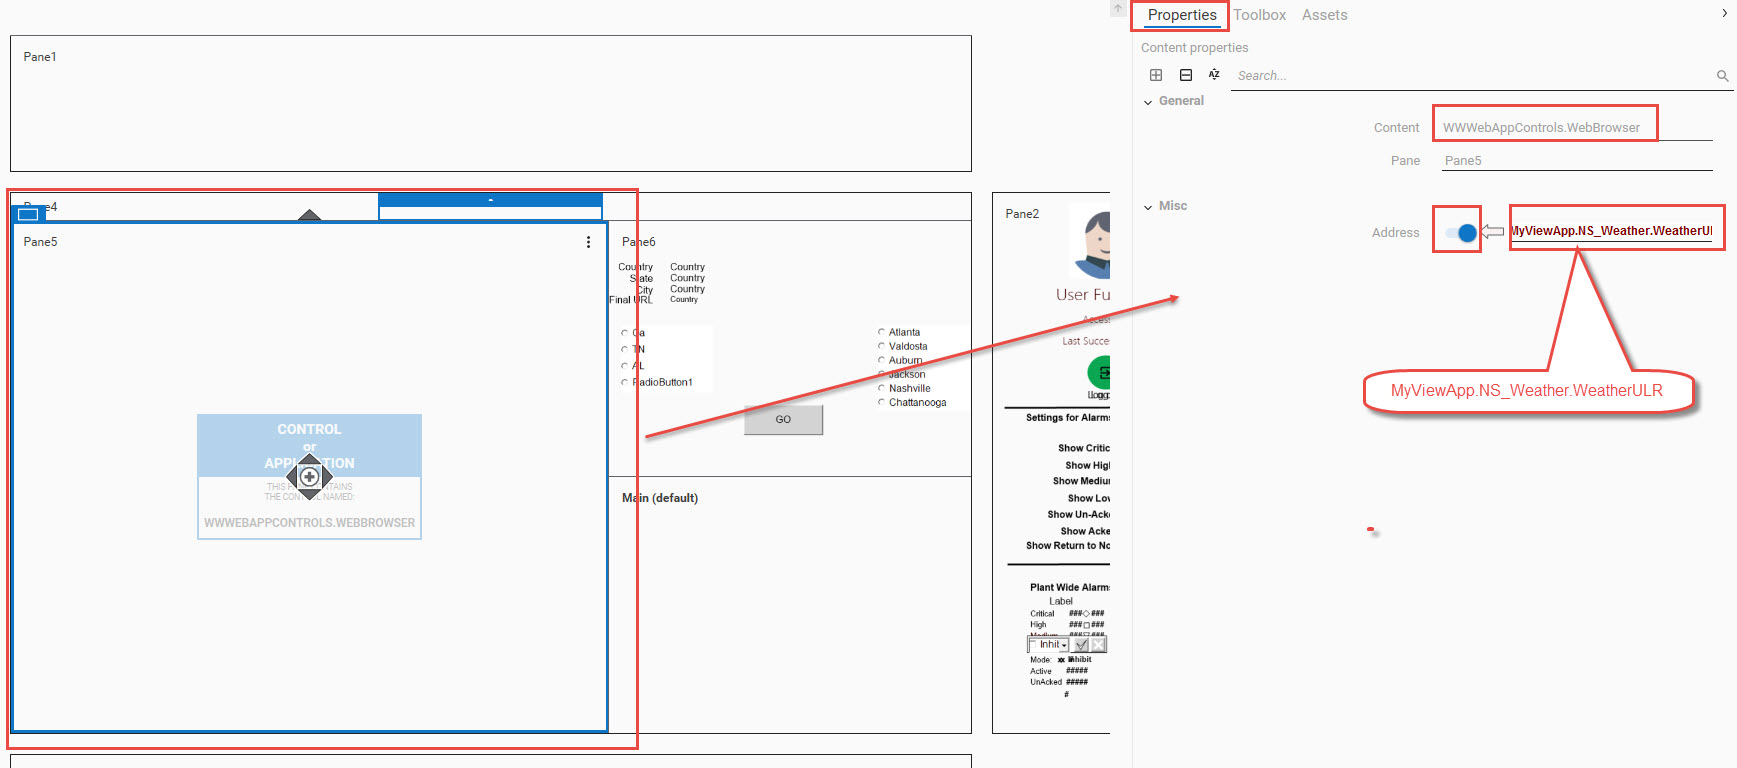
Step 3 - Configuring the Web app to access the URL from the ViewApp NameSpace variable.
Edit your OMI layout and drop the Web App onto the pane
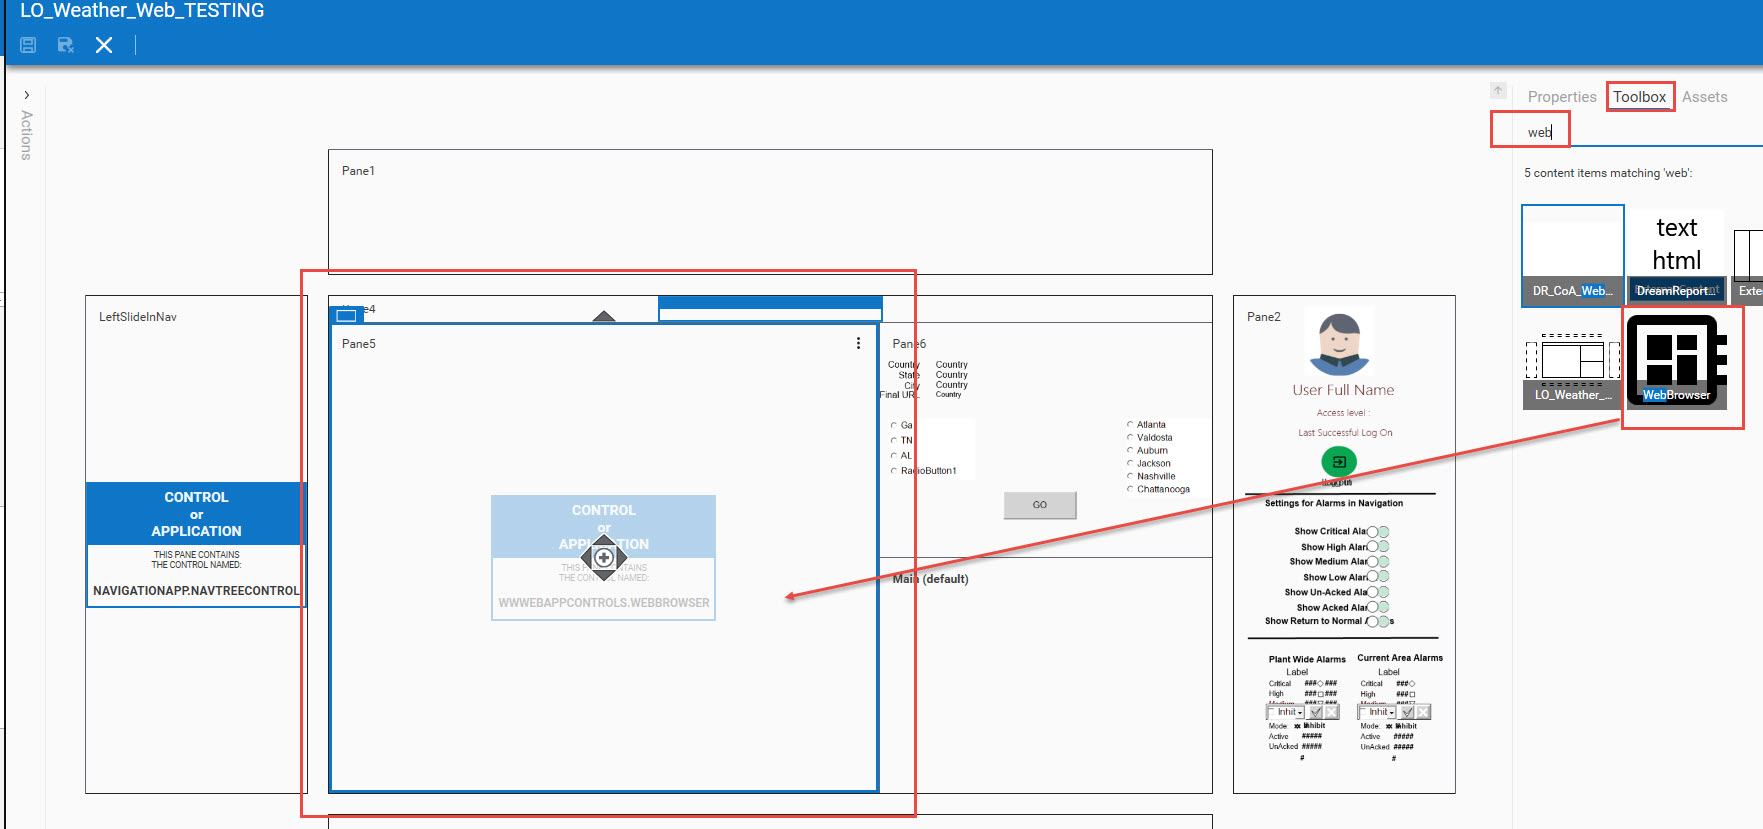
Configure the Web App to accept the URL from the name space:
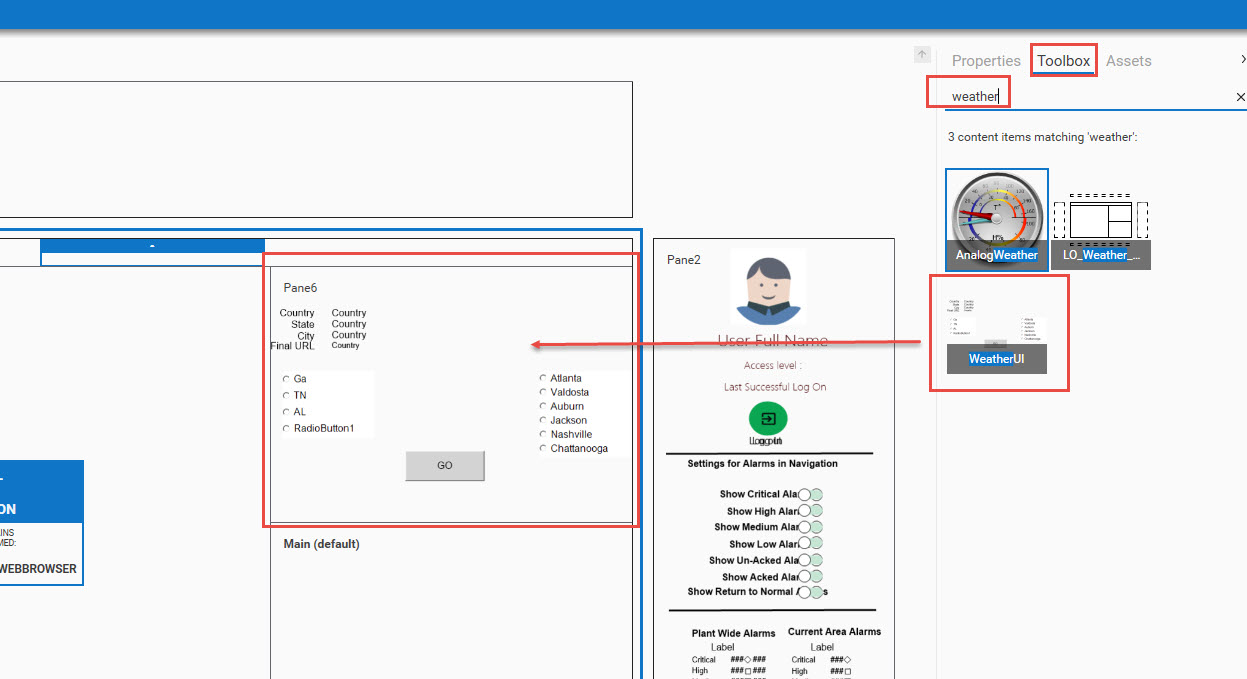
Step 4 - Adding the ArchestrA graphic to the layout
Step 5 - Testing in runtime
It is assumed the you know how to use above layout in an OMI application.
Use your OMI application to test in runtime by either deploying the OMI app or running a Preview from the dev environment.