TN AG107 Using Connection Points in ArchestrA Graphics
![]()
Description
This article from InSource shows how in 2014 R2 there is a new combination of Connection Points and Connectors which provide resilient connections between graphics with simple point, click, drag and drop operations.
- Author: Michael Dudley
- Published: 12/07/2015
- Applies to: Symbol Editor 2014 R2
Details
Adding Connection Points
You use the Connection Point tool to place additional connection points at other locations on a graphic element than the bounding rectangle. Also, you can place custom connection points on an embedded symbol and connect to them.
__________________________________________________________________________________________________________
Note: Custom connection points are part of the parent graphic element and cannot be grouped. Also, custom connection points added to a graphic element that is part of a Symbol Wizard layer are shown when the graphic element is part of the Symbol Wizard’s current configuration.
Press the Esc key to cancel adding a connection point. Also, clicking on the Symbol Editor’s canvas takes you out of connection point addition mode.
To add connection points
- Open a symbol that you want to add one or more connection points.
- Click once on the Connection Point icon from the Tools pane to draw a single connection point on a graphic element.
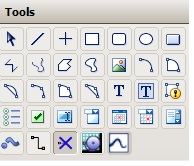
If you want to draw multiple connection points, double click on the Connection Point icon.
- Move your mouse to a location within a graphic element that you want to place a new connection point.
___________________________________________________________________________________________________________
Note: Connection points can be added within the bounding rectangle of a hosting element of an embedded symbol.
- Click once.
-The new connection point appears as a green rectangle at the location you selected.