TN Appsvr134 Using the ArchestrA Bulk Import Utility
![]()
Description
This tech note from InSource provides step by step instructions in the use of the ArchestrA Bulk Import Utility.
- Author: Rich Brooks
- Published: 6/23/2015
- Applies to: Application Server (all supported versions)
Details
The following are detailed instructions on importing attributes into a new automation object instance. It is assumed that the attribute information is obtained from a CSV file. Including the item addresses in the CSV is optional. A derived template created from the User Defined template is used in this example.
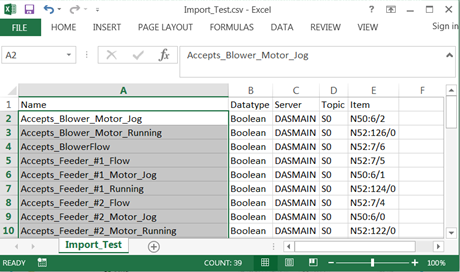
1. The first step is to create a CSV (comma separated values) file with the attributes to be imported. Below is a typical list of headers for the import file:
Name – the name of the attribute (do not include the object name)
Datatype – the data type for the attribute (this may be different from galaxy data types)
Server – the name of the DI Object in the galaxy
Topic – the scan group found in the DI Object
Item - the PLC program address or tagname
Note: Be careful to save the file in CSV format. Do not save to the default Excel format.
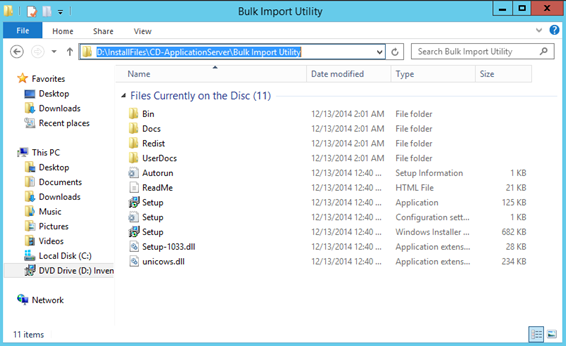
2. Install the Bulk Import Utility from the Wonderware System Platform installation disk. Run the Setup application found in the D:\InstallFiles\CD-ApplicationServer\Bulk Import Utility folder.
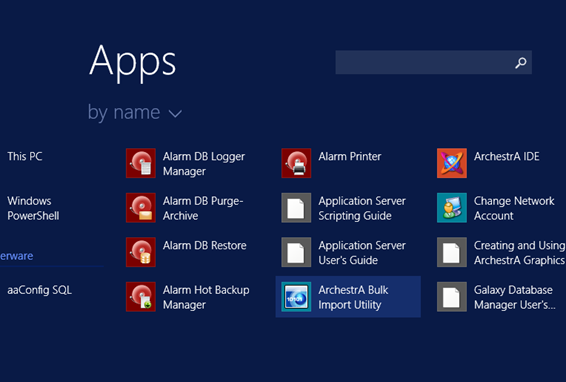
3. Launch the ArchestrA Bulk Import Utility from the installed Apps found under Wonderware.
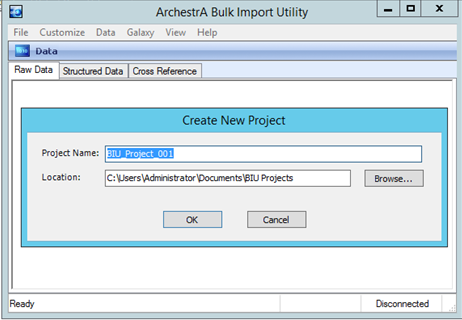
4. Click on File – New from the menu to create a new project. Define the Project name and Location for the project and then click on OK.
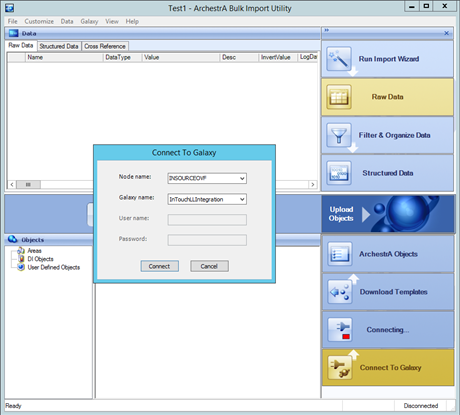
5. Click on the Connect to Galaxy button on the lower right of the utility. Select the Node name and Galaxy name from the drop down lists. Enter the User name and Password, if security is enabled. Click on the Connect button.
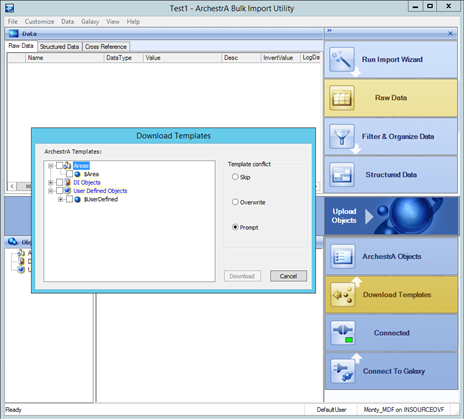
6. You should see a green light on next button to the lower right when the connection is established. Click on the Download Templates button to select the templates to be used in this import. Note: Areas, DI Objects, and User Defined Objects are the only templates types that may be used with this utility.
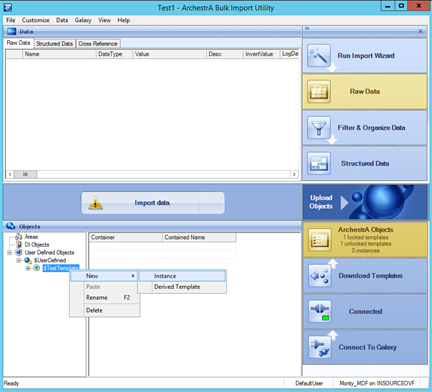
7. Right-click on the desired template to create a new instance. Give the new automation object instance a name.
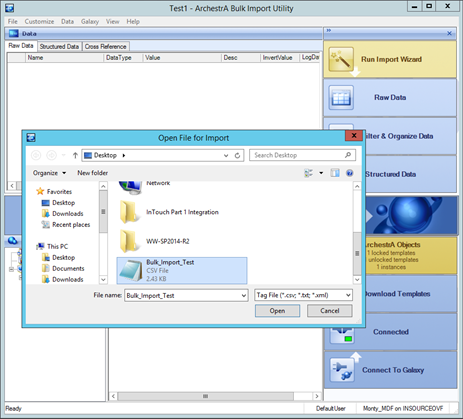
8. Click on the Run Import Wizard button to the top right. Browse to the CSV file created in step one. Click on the Open button to load the CSV file into the utility.
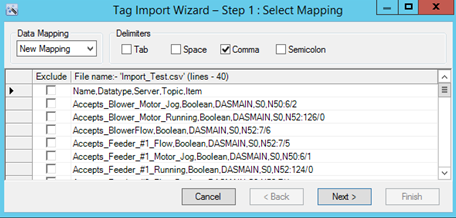
9. Click on the Next button to accept the wizard defaults.
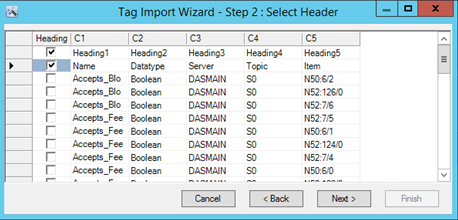
10. Select the heading checkbox for the second row if you are using headers. Click on the Next button.
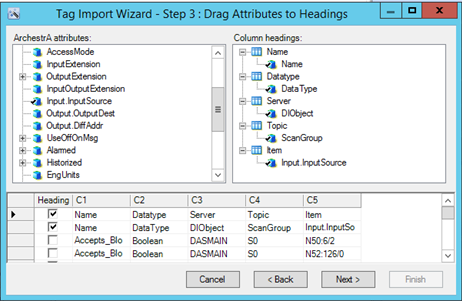
11. Drag and drop the corresponding ArchestrA attributes from the left column to the CSV Column headings on the right. This will map the CSV data to the proper attributes for the import. Mapping the Item to Input.InputSource will give the attribute read/write permissions. Click on the next button.
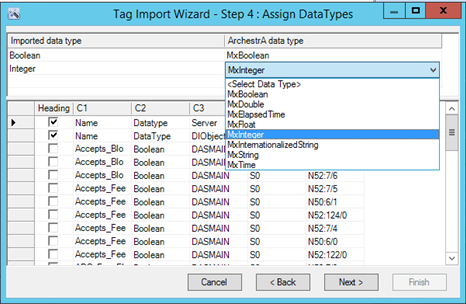
12. Assign the respective ArchestrA data types to the Imported data types. Click on the next button.
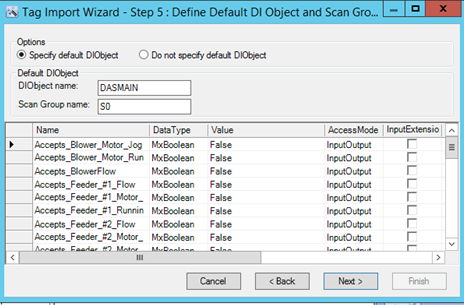
13. Click on the Next button to accept the wizard defaults.
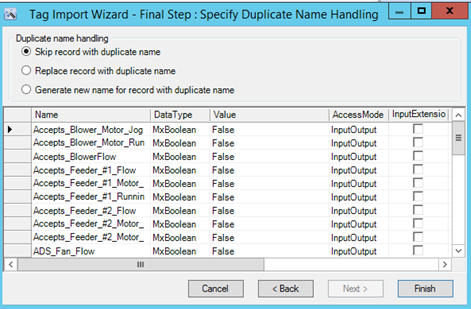
14. Click on Finish to complete the wizard.
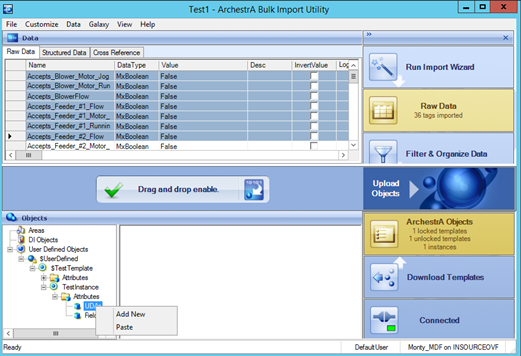
15. Highlight the attributes for one of the instances from the top panel. Right-click to select Cut from the list. The attributes will be moved to the clipboard.
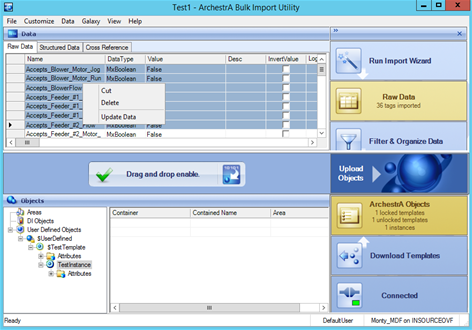
16. Expand out the desired instance from the bottom panel. Right-click on the UDAs item under Attributes to select Paste from the list. The cut attributes will be pasted into the instance..
17. Repeat steps 15 and 16 above for other attributes and instances.
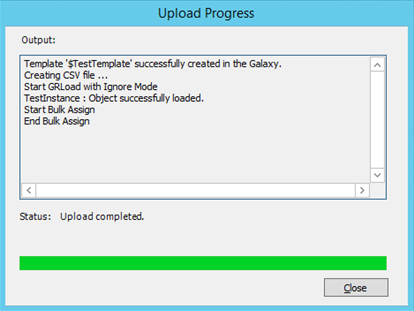
18. Click on the Upload Objects button to the middle right of the utility. Select the instances to be uploaded to the galaxy. Click on the Upload button.
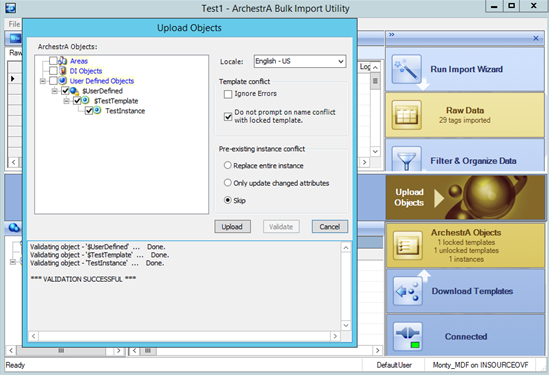
19. The Upload progress will verify the successful import of the new automation object(s).