TN Appsvr117 Importing Windows Forms Client Controls into ArchestrA Graphics
![]() TECHNOTE
TECHNOTE
Description
This document provides step by step instructions on importing the Windows Forms client controls into Application Server. The Microsoft System.Windows.Forms.dll provides fifty plus client controls that may be utilized in ArchestrA graphics. Installation is a simple process of importing the .dll file, and then graphically adding the desired control from the Symbol Editor. Controls such as the Web Browser, Progress Bar, Month Calendar, and more are easily embedded using the graphical development environment.
| Author | Rich Brooks |
| Publish Date | 1/3/2014 |
| Applies to Software | Application Server Graphics |
| Applies to Version | System Platform 2012 or Higher |
| Applies to System/Module | ArchestrA Graphics |
| Article Version | 01.01.01 |
Overview
This document provides step by step instructions on importing the Windows Forms client controls into Application Server. The Microsoft System.Windows.Forms.dll provides fifty plus client controls that may be utilized in ArchestrA graphics. Installation is a simple process of importing the .dll file, and then graphically adding the desired control from the Symbol Editor. Controls such as the Web Browser, Progress Bar, Month Calendar, and more are easily embedded using the graphical development environment.
1.0 Pre-requisites
Install Wonderware Application version 3.5 or higher. Refer to the installation guide as supplied with the System Platform 2012 or higher DVD. Create a galaxy with the template of your choice. Connect to the galaxy repository to open the Integrated Development Environment (IDE).
1.1 Import client control
The first step in the configuration is to import the client controls from the .dll file.
Select Galaxy – Import – Client Control… from the ArchestrA IDE menu as pictured below.
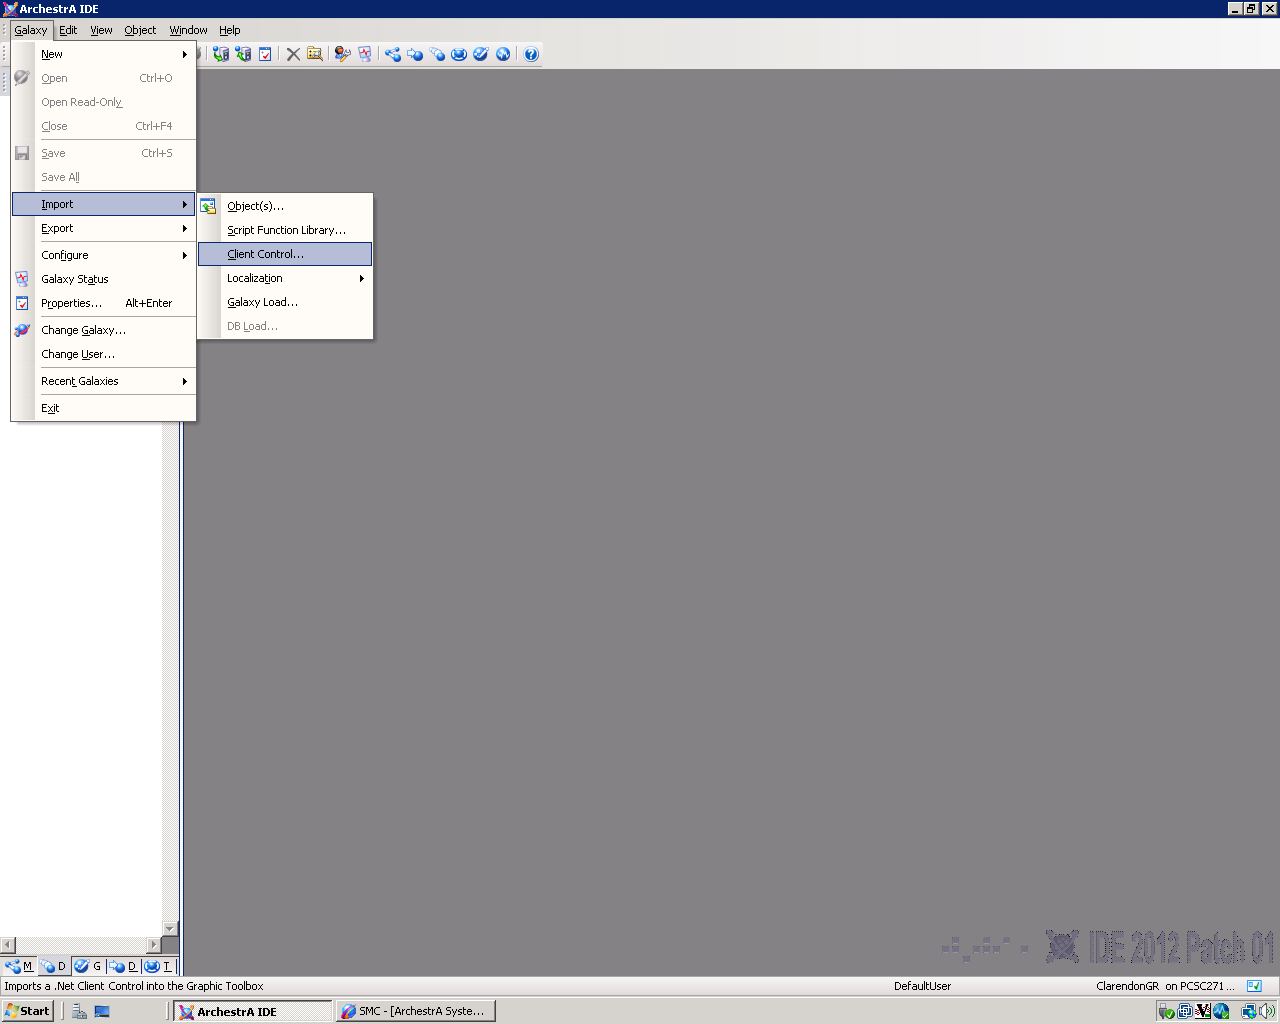
Browse to the following folder from the Windows Server 2008 operating system:
C:\Windows\Microsoft.NET\Framework\v2.0.50727\
Highlight the System.Windows.Forms.dll file and click on the Open button.
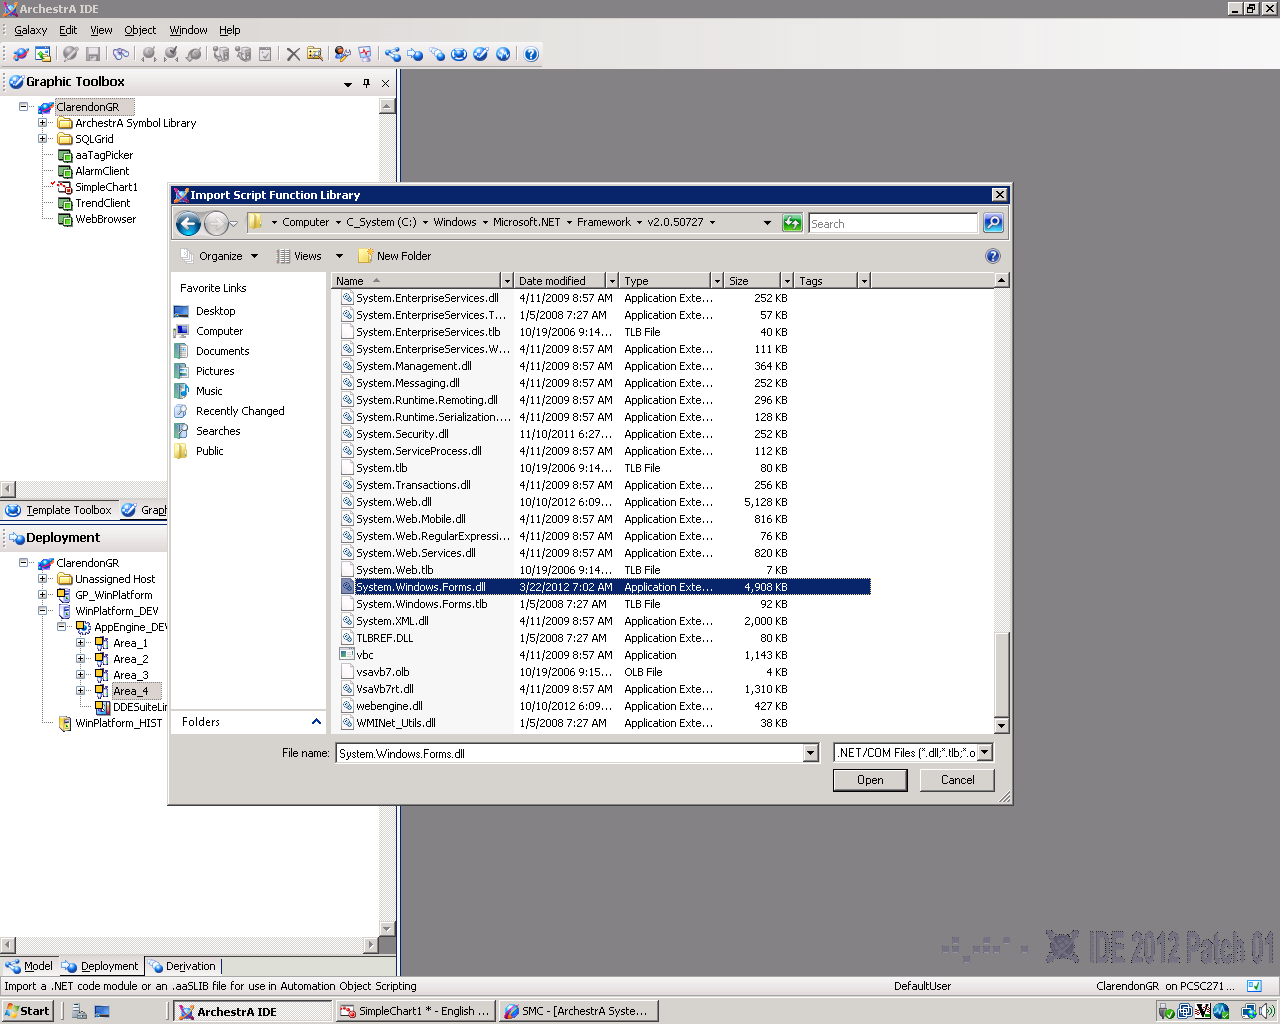
Click the OK button to accept the default Skip: Do not import to avoid the import of controls with the same Tagname as an existing object.
The import of the client controls will proceed. Wait for the Import completed notification before clicking the Close button.
![]()
The Windows Forms Client Controls are now installed and ready for use.
View the IDE Graphic Toolbox to see the various Windows Forms Controls.
![]()
1.3 Using the Client Controls
Create a new symbol or open an existing symbol to add one or more of the client controls.
Right click on the Graphic Toolbox – Galaxy to select New – Symbol.
![]()
Right click on the new symbol or double click to open the new symbol for editing.
The Symbol Editor will be launched. Click on the Client Control tool to open the Galaxy Browser.
![]()
Select the Web Browser control from the available controls.
![]()
Drop the control on the Symbol Editor by clicking on the drawing pane. Resize the control as desired.
![]()
Double click the control to open the properties pane. Add a URL Reference to a custom property.