TN - 1138 Using a Certificate Provided by IT for SMS
Description
This article from InSource shows how to use a certificate provided by IT when configuring the AVEVA Common Platform System Management Server. The machines running AVEVA software are configured to trust one another to make use of encrypted communication.
- Author: Rich Brooks
- Published: 4/1/2021
- Applies to: AVEVA System Patform 2020 R2 and higher
Details
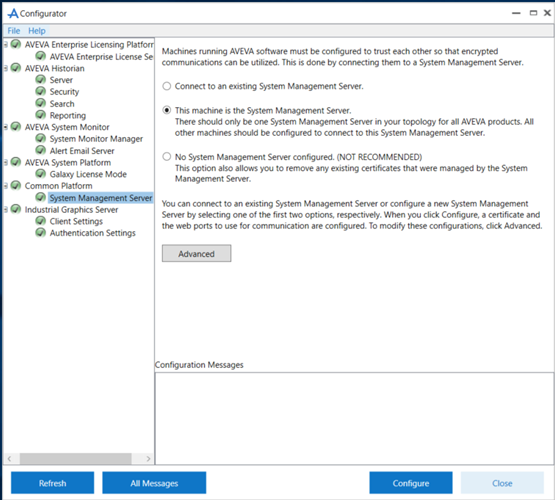
The Common Platform System Management Service is setup from the Configurator. Select the This machine is the System Management Server radio button. One machine is configured as the System Management Server and the other machines are configured as clients to the SMS server.
Note: IT Provided certificates should be installed by IT prior running the Configurator. That includes any required root, intermediate, and/or personal certificate(s). The certificates need to be installed locally on each machine in the system. Create a personal certificate (.pfx file) that combines the certificate (.cer file) with the private key. A tool such as the ssl-converter found on sslshopper.com may be used to create the pfx file.
Install the root certificate to Root, the intermediate certificate to Intermediate, and the SSL certificate to Personal.
|
Certificate |
Store |
Private Key access Permissions |
|
root certificate |
Local Computer Trusted Root Certification Authorities store |
|
|
intermediate certificate |
Local Computer Intermediate Certification Authorities store |
|
|
SSL certificate |
Local Computer Personal store |
ArchestrAWebHosting user group read access is granted by Configurator |
The following certificate fields are required. Check to be sure the certificate includes the required fields.
|
Field |
Value |
Comment |
|
Key Usage |
Digital Signature, Key Encipherment, Data Encipherment (b0) |
Required. |
|
Enhanced Key Usage |
Server Authentication (1.3.6.1.5.5.7.3.1) |
Required. |
|
Subject Alternative Name |
DNS Name=localhost |
Only required when your client accesses your web applications via localhost. |
|
DNS Name=[machine name] |
Only required when your client accesses your web applications via the machine name. e.g. DNS Name=mymachineName |
|
|
DNS Name=[public origin] |
Only required when the Management Server Public Origin feature is enabled per How to Use Public Origin. e.g. DNS Name=mypublicorigin.mydomain.com |
|
|
DNS Name=[fully qualified domain name] |
Required when the wildcard domain name is not used. PCS framework uses the FQDN as the endpoint identity to authenticate the PCS web service. This item must be the last entry in the SAN list due to a known Microsoft .Net Framework issue. More on the issue here and workaround here. e.g. DNS Name=mymachine.mydomain.com |
|
|
DNS Name=[wildcard domain name] |
Only required when IT plan to deploy the Management Server on any machine in the domain. e.g. DNS Name=*mydomain.com |
|
|
Friendly name |
A friendly display name |
Required. Configurator displays the friendly name in the certificate drop-down list. e.g. IT Binding Certificate |
Click on the Advanced button in the Configurator to continue. The default option is to use the Automatically Generated certificate provided by AVEVA.
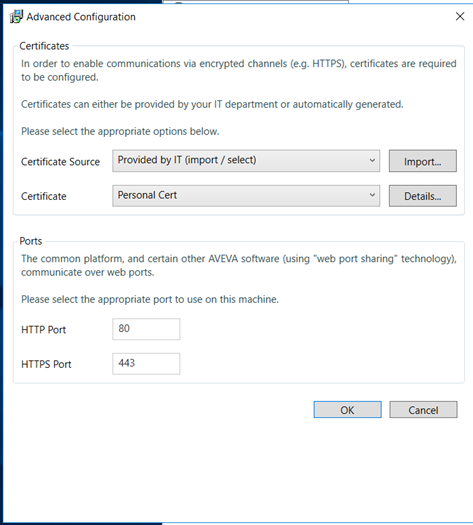
Alternatively, select Provided by IT (import/select) from the drop down as the Certificate Source. Also, select the personal certificate friendly name from the Certificate drop down list.
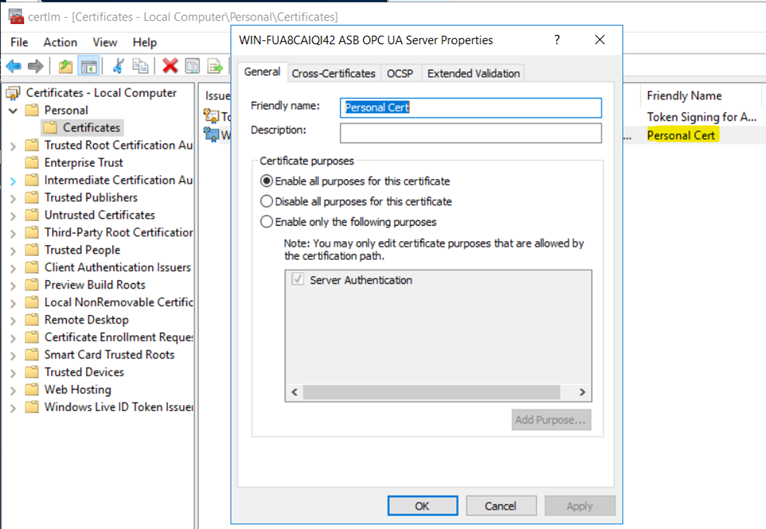
The Friendly name is added from the Certificate Manager. Expand out Personal to select the Certificates folder. Right click on the certificate to select properties. Type in the Friendly name and click on the OK button to save and close the dialog.
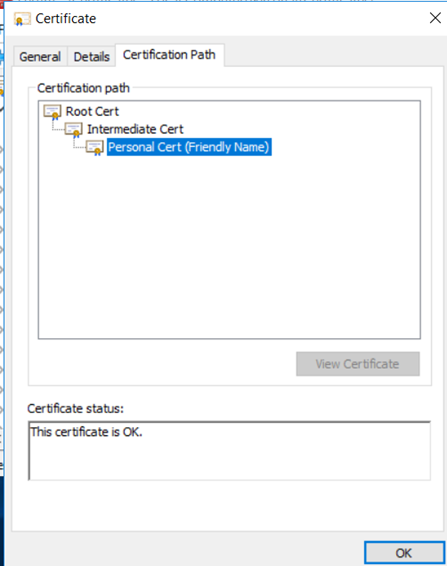
Select the details button back in the Configurator. Verify the certificate selected is correct as viewed from the Certificate Path tab. Also, check to be sure that certificates exist with valid dates in the associated Certificate Store.
Click on the Ok button to close the advanced configuration dialog and then click on the Configure button in the Configurator.
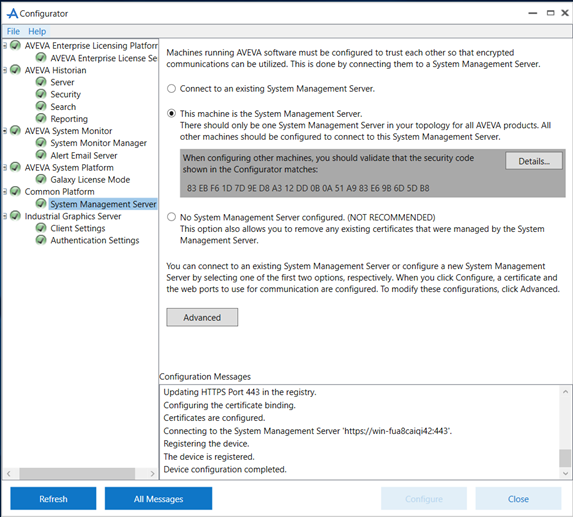
Check the Configuration Messages for any warning and/or error messages. It will display Device configuration complete when it completes successfully.