Configuring Standalone Recipe Manager Plus
| |

| Internal Use Only |
Description
This is a configuration guide for Standalone Recipe Manager Plus (RMP). Reference this guide for configuration examples and details specific to running RMP in Standalone mode.
| Author | Rich Brooks |
| Publish Date | 9/10/2014 |
| Applies to Software | Recipe Manager Plus |
| Applies to Version | v1.0 |
| Applies to System/Module | |
| Article Version | 01.00.00 |
************************************************************************************************************************************************************
Introduction
This is a how to guide for the setup of Recipe Manager Plus (RMP) to be used in Standalone mode. Standalone mode means that you use the Recipe Manager Plus web client for configuration and runtime including mapping IO and execution of the recipes. This is applicable to situations where RMP will not be implemented with full System Platform.
Detailed Steps
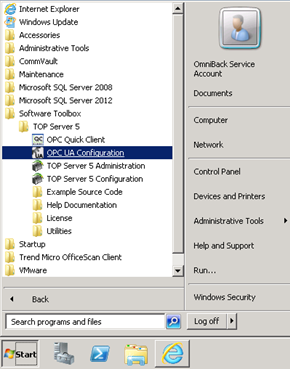
The first step is to review the OPC UA configuration. This guide makes the assumption that the OPC UA server has already been installed. RMP in Standalone mode does require an OPC UA Server (purchased separately). The OPC server provides the connection to the PLC for reading and writing recipes. We have used SoftwareToolbox’s TopServer in the screen captures. Access the OPC UA Configuration from the Start Button – All Programs – Software Toolbox – TOP Server 5 – OPC UA Configuration.
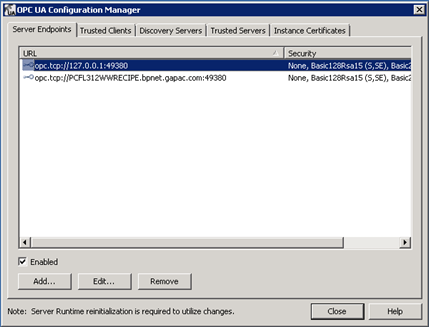
Review the Server Endpoints configuration. This information is needed when running the RMP configurator if not populated automatically. The server endpoint includes the TCP connection information and port number used. Highlight the first URL and then click on the Edit… button.
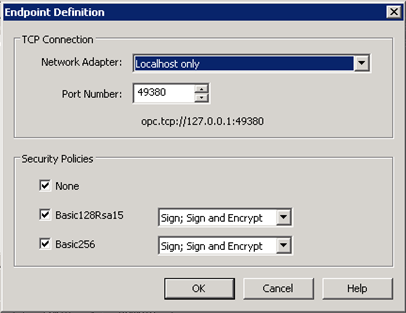
Check the checkboxes for all of the options under Security Policies. Select the Sign; Sign and Encrypt option in both of the drop down lists. Click the OK and then Close buttons to save the settings.
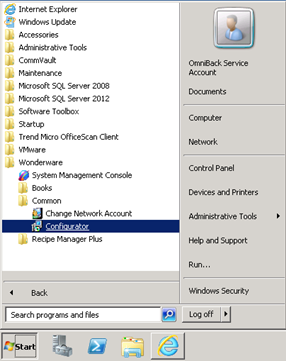
The second step is to run the Configurator for RMP. The Configurator configures the database, web application, and OPC UA Client service. Open the Configurator from the Start Button – All Programs – Wonderware – Common – Configurator.
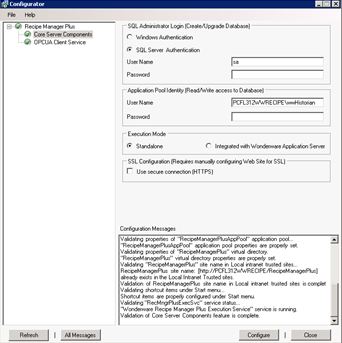
In the left pane, expand out Recipe Manger Plus and then highlight to select the Core Server Components. Specify the account that will be used to log on to SQL Server and create the RMP database. Specify the user account that the web application will use to access the recipe model database. We used the Wonderware network account since the password does not expire. Select the Standalone Execution Mode radio button. We have left the Use secure connection (HTTPS) unchecked. Click on the Configure button. Monitor the Configuration Messages for the completion status.
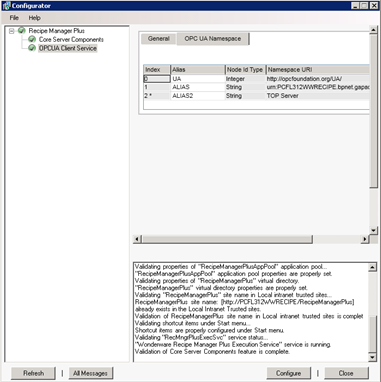
Next select to highlight the OPUA Client Service in the left pane. Type in a Scope Name of your choosing to use as the Namespace in the item references. Type in the OPC UA Server node name and Endpoint URL if they are not populated automatically. The Endpoint URL needs to match the information seen in the OPC UA Configuration Manager. Leave the defaults for Security Message Mode, Security Policy, and User Credentials, and Service Details. Click on the Configure button. Monitor the Configuration Messages for the completion status.

Select the OPC UA Namespace tab in the right pane. The alias list should be populated similar to the screen capture below when the OPCUA Client Service is fully configured. Click on the close button.
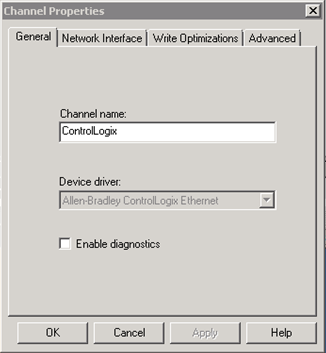
The third step is to configure the OPC Server for use with RMP. Access the configuration from the Start Button – All Programs – Software Toolbox – TOP Server 5 – TOP Server 5 Configuration. Add the required channels, devices, and tags to be used in recipes. Below is a screen captures showing the ControLogix channel, Press device, and associated tags.
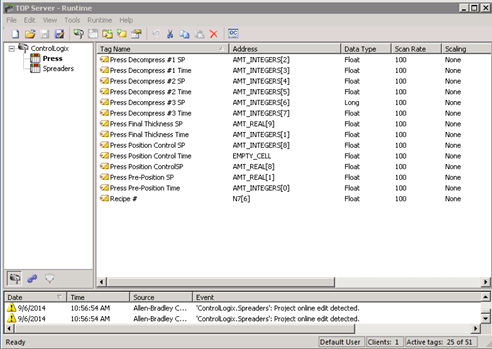
The Allen-Bradley ControlLogix Ethernet Device driver was used in this example.
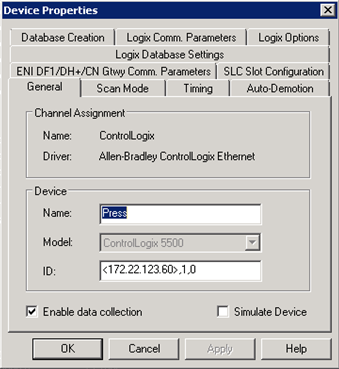
Syntax is critical for the ID of the device shown below. The ID consists of the following:
<IP or Hostname>,1, [,Optional Routing Path>,<CPU Slot> for ControlLogix 5500.
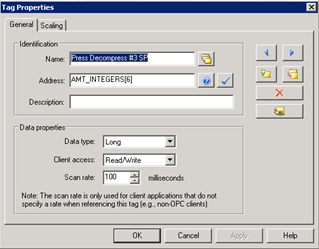
The tag name is user defined, but the address and data type must match the PLC program.
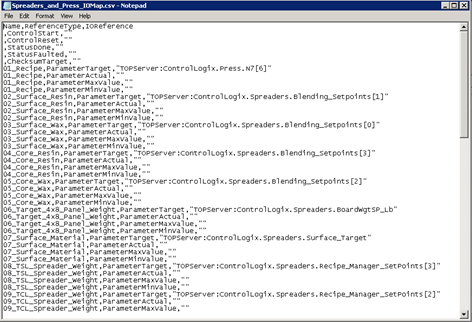
The final step is to build the IO Mapping for RMP. Export the IO Map from each equipment. The exported CSV file may be edited from Excel or notepad. Be careful to maintain the CSV format. The IO Reference column must be defined for all ParameterTarget Reference Types. All other Reference Types are optional.
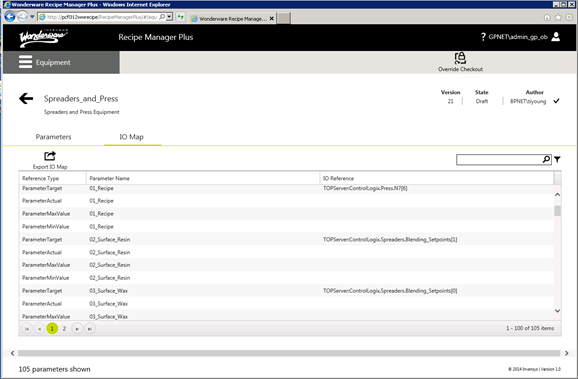
This is an example IO Map export csv file. Import the completed csv file back into RMP.